User:Fafa114/Livemap View history

Revision as of 16:24, 1 June 2015 by Fafa114 (talk | contribs)
Accueil AccueilApplication ApplicationEdition EditionCommunauté CommunautéSupport Support

navigation rapide vers...

Accueil Applications Waze
Carte Temps-Réel
Application mobile Installation de Waze


Live Map est une version basée sur navigateur des cartes opérationnelles de Waze. Elle affiche le trafic actuel et les rapports des Wazers créés depuis leur application client. Elle est utilisée couramment par les éditeurs de carte lors des recherches de problèmes pour afficher les instructions de navigation qui seront fournies à l'application client.

Interface principale

L'écran principal de Live Map fournit tous les contrôles nécessaires pour gérer l'interface web.

Mouvement de la carte

Lors de l'affichage de la carte, utiliser la souris pour cliquer-glisser un point quelconque de l'écran pour déplacer ou faire défiler la carte vers un autre emplacement.

Contrôle du zoom

Dans le coin inférieur droit des boutons plus et moins sont affichés.

Appuyez sur le bouton plus pour zoomer plus près et appuyez sur le bouton moins pour un zoom arrière à partir de l'affichage actuel. La molette de défilement de la souris sert également à zoomer et dézoomer sur la carte. Il y a 15 niveaux de zoom sur la Live Map allant de l'affichage d'une rue jusqu'à l'affichage d'un continent.

Recherche

Search box
Search box
Dans la zone Rechercher, placez le curseur de la souris dans le champ de texte et entrez l'adresse ou le point d'intérêt, puis appuyez sur la touche Entrée ou cliquez sur la loupe.

Si la description entrée possède plus d'un résultat, une liste sera affichée. Si le résultat souhaité n'apparaît pas dans cette liste, ajoutez des informations supplémentaires à l'adresse pour limiter la recherche et appuyez à nouveau sur la loupe ou la touche Entrée. Une fois la destination souhaitée trouvée, sélectionnez-la. Une épingle sera placé à cet emplacement et la carte se recentrera sur cette épingle.

Si la Live Map affiche seulement de l'eau bleue partout, il peut être nécessaire de dézoomer et déplacer la carte vers le continent souhaité. Lorsque la carte est à proximité d'un continent qui ne contient pas la destination souhaitée, il peut être difficile de rechercher sans avoir déplacé la carte au préalable sur le bon continent. Une fois l'emplacement recherché identifié, utilisez la souris pour sélectionner l'épingle pour faire apparaître la boîte de sélection.

Navigate box

Navigate box
Navigate box
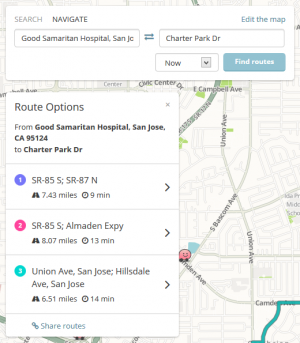
In the Search/Navigate box click on Navigate if it is not already highlighted. Enter the locations with the origin (or from) on the left and destination (or to) on the right to see the best possible routes between them. Use the opposing double arrow between the two text fields to reverse the origin and destination points and view the route in the opposite direction. Locations can also use points of interest and coordinates (longitude and latitude) as well. This box will also automatically get filled up when using the navigation points selection box to pick the origin and destination points directly from the map.

Time option

Time selector
Time selector
In addition to seeing the routing options right now based on current traffic data, use the time of day drop down box to select an alternate time. This will show the routing options available based on historical data for other times of the day or night. The options are in 30 minute increments both earlier and later than now. The drop down box uses a 24-hour notation.

24-hour format

Find routes

Route options and share routes
After entering the origin and destination locations, press the Find routes button. That will display up to three routes shown on the map with different colors. Each one provides the total distance and estimated travel time for that route.

Select one of the routes to see the turn-by-turn instructions for that route. Press the < link to return to the original list.

Share routes

Once the route options are displayed, a link to Share routes is displayed at the bottom of the list of route options. Select the link and the permalink to that location is displayed where you can copy and paste it in an email or instant message to someone. The routes are not saved in the URL, but when the link is looked up in the future, it will recalculate the route options at that time.

This permalink will always show the two locations, but the other two permalink icons on the Live Map interface may not always show the same results.

Edit the map

Link to Waze Map Editor
From the top of the Search/Navigate box there is a link to Edit the map. This links directly to the Waze Map Editor.

Permalink

Permalink
Permalink
In the lower right corner of the Live Map is the permalink button represented as a chain link. This is the same as the Share routes link from the Route options window, but note that at times this link may or may not always show the two selected points for navigation. To be safe, use the Share routes option from the route option box.

Pin

Pin icon
Pin icon
This marks the location of a searched address. It also marks the location of the current origin when navigating.

Flag

Flag icon
Flag icon
This marks the location of the current destination when navigating.

Navigation points selection box

Navigation points selector box
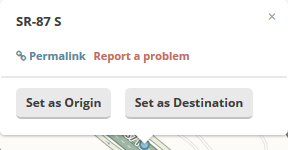
Use the mouse to left-click any point on the map. Be sure not to click on a any Wazer, report icons, or roads with highlighted traffic. If there is a road at the selection point, the box will display the name of the road, otherwise it will say there is no road selected. Four additional links are presented from this box as covered below.

Set as Origin

Select this option to set the origin pin for routing. A blue pin is set on the map in that location and the search/navigate box will switch to navigate and fill in the origin field. If no road is near that pin, routing will be made from the nearest road to that location.

Set as Destination

Select this option to set the destination pin for routing. A checker flag is set on the map in that location and the search/navigate box will switch to navigate and fill in the destination field. If no road is near that pin, routing will be made to the nearest road to that location.

Once the origin and destination points are set, return to the search/navigate box to select the time and find the route(s).

Permalink

This is the same as the other permalink locations on the page.

Report a problem
Report a problem
Report a problem
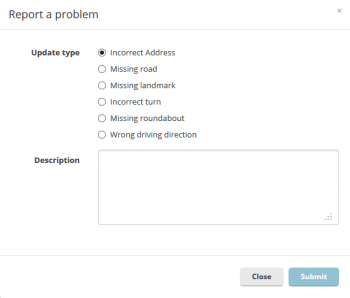
update requests can be entered from the Live Map, which will appear in the Waze Map Editor. Select from the list of radio buttons that best matches the issue being reported. These options are similar to the list available in the client app. If it does have exactly what is desired to be reported, there is a big space for typing the exact issue to pass to a map editor. Press the Submit button to send it to the Waze Map Editor. Alternately press the Close button to close the window without sending the report.

Longitude and latitude display

Latitude and longitude
The longitude and latitude display in the lower right corner identifies the coordinates of the mouse pointer on the map. Note these coordinate are in the reverse order of what is entered in the client app.


Live data displayed

Wazers and reports on the Live Map
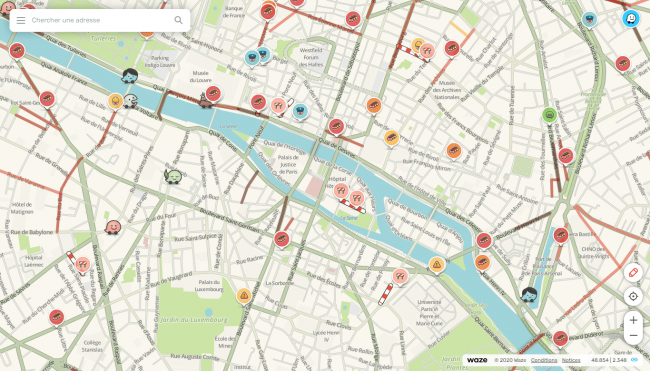
The live data presented on the map mainly uses icons similar to those in the client app.

Wazers

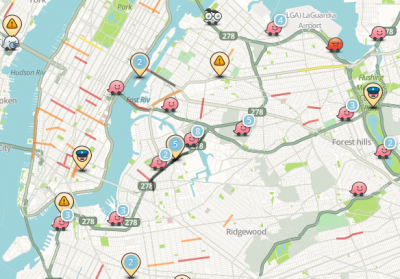
Like the client app, these Wazer icons are time-delayed and are not real-time. They update every minute or two and they are not selectable. Multiple Wazers in close proximity will be displayed with a blue number. Double-click or zoom into the map to see them individually.

Reports

Like the client app, these are real-time live reports based on input from Wazers driving in those areas. The alert types include all the same alert types as the client app excluding the cameras. As with Wazers, multiple reports in close proximity will display a single pin with a blue number showing how many pins are represented with that one pin. Double click the number or zoom in to see the individual pin details. Click on a pin to view the details like the hazard type and who reported it.

Chats

Chats use the same icons as on the client app. When they are selected, the chat will be displayed.

Road closures
Road closure report
Road closure report
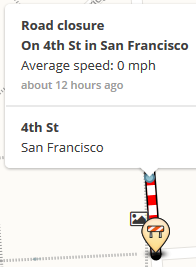
The road closure system in the client app will display in the Live Map. Click on a closed road to see the detailed description of the situation. The small image next to the road closure pin indicates an image is available for that location. Click on it to display the image added by a local Wazer.

Real-time traffic

Detailed traffic report
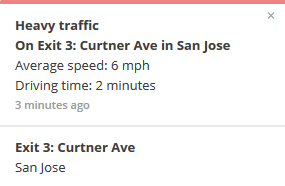
Real-time traffic is tracked in the Live Map. The colors include, yellow, orange, red, and black. As the color progress from the light to the dark, it indicated higher levels of traffic. Using the mouse, click on a color road to see the details of those traffic conditions.