Or via the area where you are allowed to edit: click on the Areas tab on the left hand side of the editor screen and next click on the area
Or via the routes you have droven lately: click on the Drives tab on the left hand side of the editor screen and click on one of the drives.
Move the map to the location where you want start editing bij moving the mouse while keeping the left mouse button pressed.
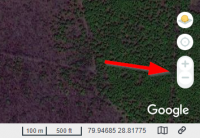
Zoom
If necessary zoom-in or zoom-out via the zoom control bottom right on your screen.
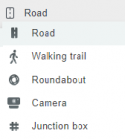
3. Add a missing road bij clicking on the Road menu at the top and selecting Road.
Move the little blue circle to the starting point on the new road and click.
Move the cursor and click on each corner of the new road.
Double click to finish the road drawing. The thin blue line becomes a thick line with A and B as starting and ending points.
During the drawing of a new road
After the double click to finish the drawing
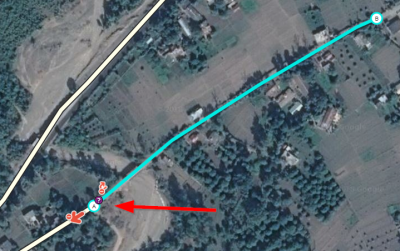
Start connecting the new road segment.
Drag the end of the new road to the existing road.
The red arrow mean that driving from this segment to the existing road is not (yet) allowed.
The little red U-turn arrow mean that turning on the newly made road is not (yet) allowed.
Connect the new road to the existing one. Ignore the pop-up menu.
Click on the red arrow to make it green and allow traffic from the new segment towards to existing road.
Click on the red U-turn arrow to make it green to allow turning on the new road.
The connection from the new to the existing road is now defined. The other way around is still to be done.
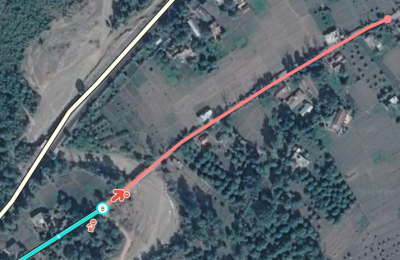
Connect the existing road to the new one.
Click on the existing road to select it.
Then click on the red arrow to make it green to allow navigation from the existing road to the new road and click on the red U-turn arrow to allow turning.
The connection from the existing road to the new one is now also defined.
4. Give the new road a name
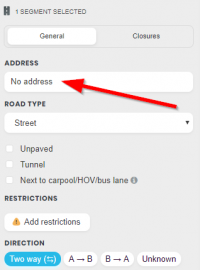
By selecting the new road on the map and then
Clicking on the Address field, left hand side of the screen. The Address field is now expanded into separate fields for Street, City, County and Country.
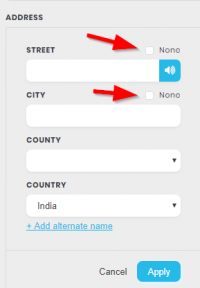
Enter values for the Address fields. In most of the case the Street and City name are unknown: check None. Fill the County field with the State name and Country of course with India.
Click the Apply button.
5. Save your changes
Save your changes by clicking on the Save button on the top right on the editor screen. The number shown in the Save button is the total number of changes you made for drawing a new road, connecting it to an existing one and finally defining its address.