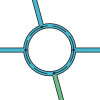
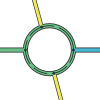
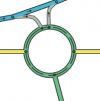
Las rotondas o glorietas, son segmentos de vía únicos en el rutado de Waze. Cuando un conductor se aproxima a una rotonda, se muestra un icono específico en la zona de instrucciones de giro de la pantalla, con un número que corresponde a la salida contada desde el punto de entrada del conductor en la rotonda. Crear manualmente una vía circular no hará que Waze la considere como una rotonda.
Qué es una rotonda y qué no lo es
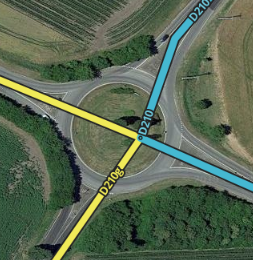
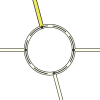
Debemos tener claro que no todo lo que vemos redondo (visto desde arriba) es una rotonda. Una rotonda (glorieta) es un tipo especial de intersección caracterizado porque los tramos que en él confluyen se comunican a través de un anillo en el que se establece una circulación rotatoria alrededor de una isleta central. No son rotondas propiamente dichas las denominadas rotondas partidas en las que dos tramos, generalmente opuestos, se conectan directamente a través de la isleta central, por lo que el tráfico pasa de uno a otro y no la rodea. Estas falsas rotondas no se deben editar en el mapa como rotondas, ya que nos darían instrucciones de navegación incorrectas.
| Descripción | Imagen |
|---|---|
| Los segmentos confluyen, pero no hay una isleta central que evite que el tráfico pase de un lado al otro. Tampoco ninguna señalización vertical o pintada en el suelo que indiquen la presencia de una rotonda. | 
|
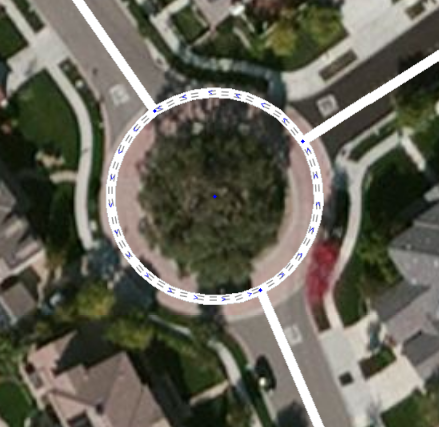
| Un segmento de calle único hacia un cul-de-sac debería ser dibujado como una calle sin salida. Con calles muy grandes podría ser aconsejable crear un bucle, pero no una rotonda. | 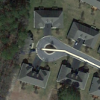
|
Creación de una rotonda a partir de una intersección
Muy a menudo, cuando las calles comienzan a estar congestionadas, los encargados de la planificación vial instalarán una rotonda para hacer que el tráfico fluya más libremente. Esta sección te muestra los pasos para crear una rotonda a partir de una intersección existente.
La situación comienza de la siguiente manera, las carreteras ya no están alineadas con el nuevo plano, y ahora hay una rotonda que debe ser creada en Waze:
Esta situación es bastante sencilla, porque todos los segmentos están ya conectados.
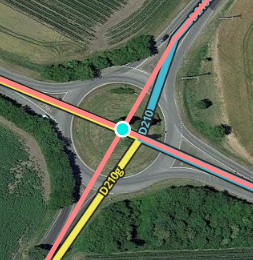
La primera cosa que hay que hacer es mover la intersección al centro de la rotonda. Esto es tan sencillo como suena: haz clic y arrastra la intersección hasta donde debería estar.
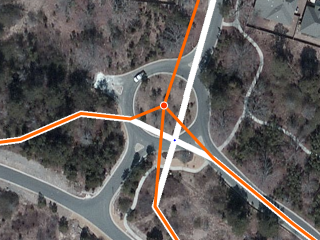
Lo que nos da esto:
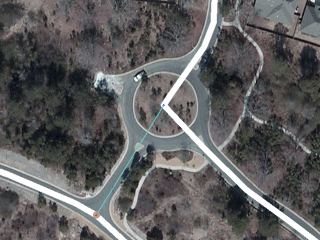
Los dos segmentos al sur tienen que ser desconectados del nodo central y juntados más abajo donde la nueva carretera se curva a lo largo de la parte inferior de la captura de pantalla. Una vez que están en su lugar, dibuja el segmento que falta entre la rotonda y las vías al sur de la misma.
Si miras con atención, verás que esta rotonda tiene en realidad cuatro entradas o salidas, así que dibuja también la vía al oeste como un pequeño tramo, para usos futuros. Esto también hará que la rotonda dé al conductor mejores instrucciones en términos de qué salida tomar. Ya que el conductor en la vida real verá la salida al tramo pequeño, lo contará como una salida.
Una vez que todo esto haya sido creado, sigue adelante y guarda el trabajo.
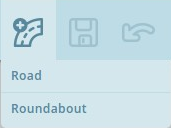
Pasa el cursor sobre el icono + grande a la derecha de la barra de herramientas y haz "clic en Rotonda. También puedes usar el atajo de teclado, que es la letra o, elegido porque la forma de la letra es redonda, como una rotonda.
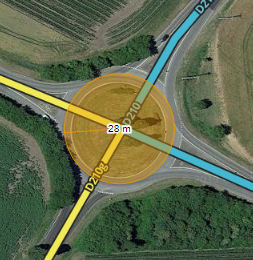
Mueve el cursor al centro de la rotonda real. El cursor será una cruz + para indicar que está en modo de creación de rotondas. Haz clic una vez en el centro y mueve el ratón en cualquier dirección hacia el perímetro de la rotonda. Un círculo anaranjado crecerá y disminuirá según mueves el ratón, y los números en el centro del círculo mostrarán cuál será el diámetro de la rotonda creada.
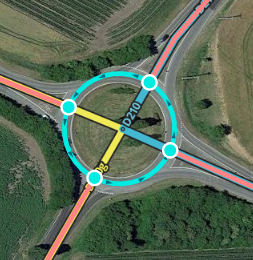
Haz clic cuando estés satisfecho con el tamaño y forma de la rotonda. Lo que ocurre ahora es que el editor de mapas crea nuevos segmentos de sentido único entre cada segmento de vía con el que la circunferencia de la rotonda entra en contacto. Cada uno de estos segmentos es recortado y conectado a la rotonda con los permisos de giro ya habilitados. Todos estos segmentos se muestran en naranja porque aún no han sido grabados.
AVISO: cualquier segmento completamente en el interior de la rotonda SERÁ BORRADO.
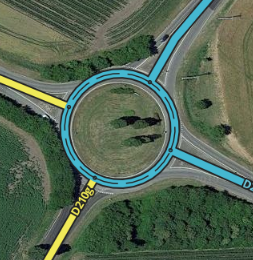
Igual que cuando dibujamos nuevas vías, los segmentos de la rotonda que fueron creados en el último paso deben ser confirmados para que aparezcan en el mapa en la aplicación de Waze. Esto es, cada segmento necesita país, estado y ciudad. Por favor, mira la sección Confirmar la vía actualizando detalles para más detalles sobre el proceso. En Waze, NO nombramos los segmentos de la rotonda. Estos segmentos se quedan sin nombre marcando la casilla "Ninguna" para el nombre. Si la rotonda tiene un nombre, entonces un landmark rellenando el área interior puede añadirse usando el nombre que aparece en las señales locales.
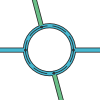
Cuando el proceso se ha completado y se ha pulsado el botón de grabar al final, así es como queda la nueva rotonda:
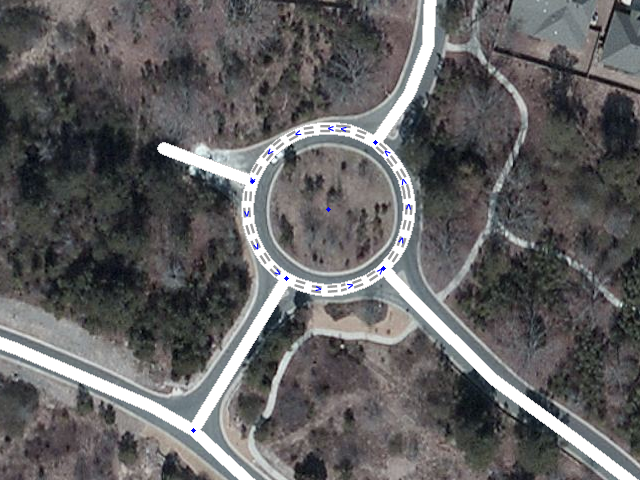
Para más referencias, por favor mira este vídeo acerca de la creación de rotondas.
Rotondas ovales y formas muy grandes
Si se necesita una rotonda oval o elíptica, mantén pulsada la tecla Mayúsculas. En este momento sólo se pueden crear rotondas elípticas a lo largo de los ejes norte-sur o este-oeste. Si se requiere una forma o eje diferente, crea una rotonda circular de un tamaño similar a la forma correcta y ajusta los nodos a mano.
Las rotondas no pueden crearse de más de 100 m de diámetro para evitar el peligro de borrar todas las calles del interior lo que podría, accidentalmente borrar una ciudad entera. Si se necesita un diámetro mayor, sigue los mismos pasos descritos arriba para modificar la forma ajustando los nodos según se requiera.
Improving manually drawn roundabouts
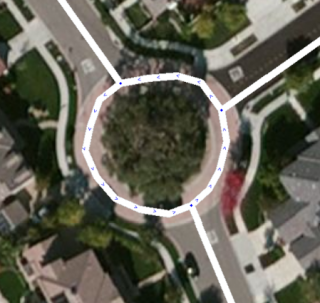
A well-meaning editor probably just didn't know how to create a new roundabout, so it was created by hand manually setting the segments as close to rounded as possible. The real problem is that Waze will not navigate these segments like a roundabout. This section of roadway will produce "turn right and then turn right" if you went straight through. This is not what the driver will expect:
A proper roundabout will tell you to "enter the roundabout and take the first exit" when going straight through, so we need to fix this "fake" roundabout.
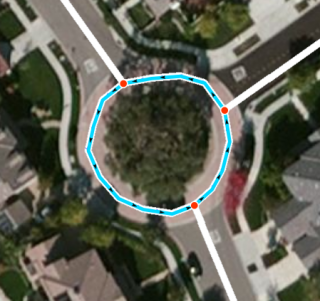
The first step is to select and delete all the segments that make up the circle connecting the roads leading into the roundabout. That can be done individually or as a group.
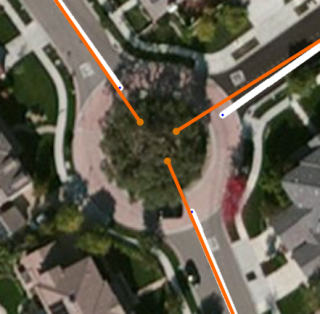
Next, extend the segments deeper into the center of the roundabout area. They need to end inside the final diameter of the roundabout, otherwise they will not be linked automatically during the final step of creating the roundabout. During this step be sure to center the roadway segments from the middle of their respective roads. Unless the actual road has a significant divider between the incoming and outgoing lanes on a road, avoid creating two separate one-way roads leading into and out of the roundabout. This creates some visual confusion and may change the instruction type given by the routing server. See Below. (It is better to use single two-way roads when connecting to the roundabout.) Press Save to ensure there are no errors before going to the next step.
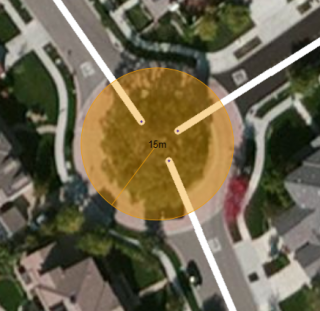
Now select Roundabout from the pencil icon, or hit O on the keyboard. The cursor turns into a small cross. Click and hold the left mouse button at the center of the roundabout area and extend outward until you reach the proper diameter. When the diameter is correct, release the mouse button to create the new roundabout.
If the visual map layer does not show a new roundabout that exists today, use the GPS tracking layer to estimate where the center of the roundabout is located.

After saving you will notice the roundabout is red. This indicates you have not yet confirmed the roundabout road segments. To do that select the roundabout segments and ensure the country, and state are selected. Also set the city or mark it as no city. In Waze, we do NOT name roundabout segments. These segments remain unnamed using the "No Name" checkbox for street name to enable proper routing. If the roundabout is a named circle on local signs, then add a Place area type set as a Junction / Interchange filling the center area or covering the roundabout as appropriate using the name that appears on the local signs.
After confirming the individual roundabout road segments, there is now a properly-formed roundabout which will give the correct routing instructions:
Note that you should not create a roundabout with only one segment. Roundabouts should be intersected by two or more road segments. Reviewing the Junction Style Guide for information on creating a loop or just dead-end.
If when creating your roundabout you do not cross any road segments, the roundabout cannot be created. There must be at least one road segment crossing the roundabout when you release the mouse button to create it.
Creating a roundabout from nothing
Draw all of the road segments that will lead to the roundabout and ensure they extend into the center of the roundabout area. Use the visual map to align the roads. From there, create the roundabout just as is described in the two sections above.
Note that there must be at least one road leading inside the area of the roundabout being created, otherwise no roundabout will be created when you use that option.
Adjusting geometry
When a segment of a roundabout is selected, the geometry nodes (white circles) will appear. Each of these circles can be moved by dragging them with the mouse to align better with the visual map or the GPS traces.
When initially creating a roundabout, it is possible to create an oval or elliptical shape by holding the Shift key when stretching the diameter before it is created. At this time only oval roundabouts along the North/South or East/West axis can be created. If an alternate shape is desired, adjust the geometry nodes as described above.
Road type
It is possible to have multiple types of roads ( Street , Primary Street , Minor Highway , etc.) meeting at a roundabout.
To minimize inefficient routing, it is important to be careful with the road type assigned to the Roundabout itself. Any routing penalty going from connected roads to the roundabout must be kept to a minimum, but it should not be too "attractive" where routing through it is encouraged when unnecessary.
The road types of interest in are, in order from highest to lowest, Freeway , Major Highway , Minor Highway , Primary Street , Street , Parking Lot Road, and Private Road. Since a Roundabout is not a Limited Access Interchange, two Freeways should never meet at a roundabout; however, it is conceivable that a Freeway might begin or end at one.
To determine what road type to use for the Roundabout:
- Identify the two connected segments with the HIGHEST type listed above:
- If a particular road goes through a roundabout, count the road as two separate segments, one on each side of the roundabout.
- If a road on one side of the roundabout is a divided roadway made of two one-way road segments, count the pair of one-way segments as a single segment.
- The two connected segments with the highest type may have the same type or different types.
- If a ramp connects to the Roundabout, use the road type to which that ramp connects.
- Select the roundabout and set the road type as follows.
- If the two highest-type segments have the same type, use that type.
- If the two highest-type segments have different types, use the LOWER type of those two segments.
Entrance and exit road segments
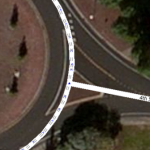
The road segments leading into and out of a roundabout are generally drawn as simple two-way roads connected perpendicular (90 degrees) to the roundabout circle itself. This makes it easier on the user to visualize the map into reality by not having the incoming lanes appear separately on the map and only see the exits. The client app will tell the driver to take the second exit, so this way the driver can see on the map how far away that is in the roundabout from where they are now.
In some cases the incoming and exit road segments may be so far away from each other that it would be better to have them split into two separate one-way segments.
This section will answer 2 main questions:
- What is a normal vs. a non-normal roundabout?
- When will I get a ‘turn right’ / ‘continue straight’ instruction vs. a ‘take the X exit’ instruction?
A non-normal roundabout:
- Will give you a ‘take the X exit’ (with arrows around it) instruction.
- Has 5 or more nodes (Ex. Each segment of a split road connects at its own node.)
- Has irregularly placed nodes (this will be covered in the examples.)
A normal roundabout:
- Will give you a ‘turn right', 'turn left’ or ‘continue straight’ instruction.
- Has up to 4 nodes, and a central node.
- All nodes are aligned within "normal" range of the entry point.
A roundabout can be both normal and non-normal at the same time depending on your entrance node.
Some examples will help explain:
- For the sake of simplicity, let’s look at a roundabout with three exits.
- The angle of the segment approaching the node does not matter, it can be similar to any of the segments below, or anywhere in between.
- Each time you approach a roundabout from one of the three nodes, an imaginary X-Y axis is drawn: (1) with the origin at the central node and (2) aligned to the entrance node.
- Coming from node #1, this is how we see the roundabout:
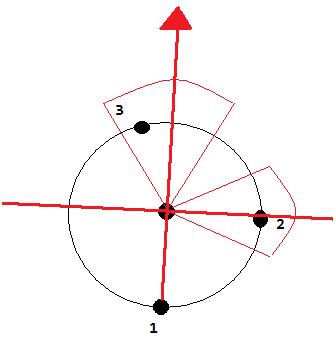
- Both exits 2 and 3 are within the normal range (90°±15° & 180°±15°).
- Both exits will get an instruction to ‘turn right’ or ‘continue straight’.
- Coming from node #3, this is how we see the roundabout:
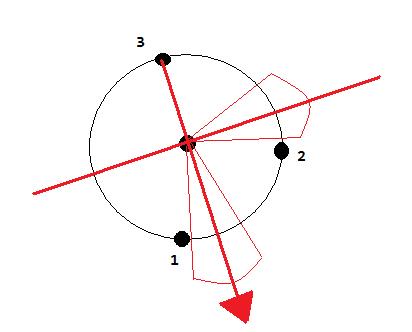
- Both exits 1 and 2 are not within the ‘normal’ range – both will get a ‘take the X exit’.
- Note: even if one of these exits was within normal range, the roundabout itself will be ‘non-normal’ and all exits will get the ‘take the X exit’ prompt. The entire roundabout must be normal.
