| Line 4,911: | Line 4,911: | ||
Aquí tendrás que poner en qué dirección se encuentra posicionada la cámara de velocidad. | Aquí tendrás que poner en qué dirección se encuentra posicionada la cámara de velocidad. | ||
======'''Chit Chat:'''====== | |||
[[Image:ChitIco.png]] Pulsando en el ícono de “Chit-Chat” verás la siguiente pantalla: | |||
'''SCREEN SHOT''' | |||
En esta pantalla podrás indicar de qué lado de la vía ha ocurrido el evento, dar una descripción corta sobre el evento y agregar una fotografía del mismo. | |||
======'''Actualizar Mapa:'''====== | |||
[[Image:UpdateIco.png]] Pulsando en el ícono de “Actualizar Mapa” verás la siguiente pantalla: | |||
'''SCREEN SHOT''' | |||
Aquí podrás registrar nuevas vías, actualizar detalles (como número de casa) y reportar problemas en el mapa. | |||
=Windows Mobile Spanish= | =Windows Mobile Spanish= | ||
Revision as of 09:01, 28 January 2011
Error: Image is invalid or non-existent.
Try your editing here
copy your text and format here, we'll clear it from time to time to keep it available to all.
You can try implementing waze templates from here, and use the official wikipedia editing help center.
Manual de uso para iPhone
Instalación
Primero revisa si tu dispositivo está conectado a la red, ya sea vía WI-FI o 3G.
Para descargar Waze pulsa el ícono de APP-STORE  en tu iPhone.
Luego busca Waze en menú General>>Categorías>>Navegación o en la ventana “buscar”.

Para dar inicio a la instalación, pulsa el botón ![]() instalar.
En caso de que no hayas estado conectado previamente a APP-STORE, recibirás el siguiente mensaje:
instalar.
En caso de que no hayas estado conectado previamente a APP-STORE, recibirás el siguiente mensaje:

Conéctate a tu cuenta o en caso de que no tengas una, tendrás que crearla.
Imediatamente iniciará la instalación de Waze en tu iPhone.

¿Tu primera vez?:
Después de haber instalado Waze en tu iPhone, pulsa en el ícono de waze para abrir la aplicación.

Si es la primera vez que utilizas Waze en tu iPhone, recibirás los siguientes mensajes:
Selecciona el servidor:
Si tu iPhone y waze no logran reconocer tu posición actual, Waze te pedirá que selecciones en qué servidor te encuentras:

- USA & Canada.
- Israel.
- International (Resto del mundo).
Seleciona idioma:
Después de haber seleccionado en qué servidor te encuentras, tendrás que escoger el idioma en el que deseas utilizar Waze.

Por último, como nuevo usuario recibirás un mensaje de bienvenida y una solicitud para aceptar las condiciones de uso de Waze.

Haz clic en el botón de aceptar para continuar utilizando Waze, o en el botón de rechazar para salir del programa. Si has aceptado los términos de uso, lo próximo será un formulario para crear tu cuenta.
Crear tu cuenta:
Primero tienes que decidir si quieres iniciar la aplicación con una cuenta nueva o iniciar con una cuenta existente:

En el siguiente formulario tendrás que proporcionar los siguientes datos: Nombre de usuario, Contraseña, una dirección de correo electrónico válida y un apodo de usuario en Waze (opciónal).

Nota I: El apodo sirve para identificarte en el mapa y en los informes que envíes (podrás definir hasta qué nivel quieres ser identificado en tu perfil---ve la sección Configuración).
Nota II: Si deseas recibir actualizaciones y noticias relacionadas a Waze, haz clic en la ventanilla “Enviarme actualizaciones”.
Dentro de este formulario existe también la opción “Saltar”. Si decides saltarte y no crear una cuenta formal en waze, recibirás un usuario temporal con el cual podrás navegar.
Sin embargo, no podrás acumular puntos ni subir de nivel dentro del sistema.

Nota III: Podrás crear una cuenta ya estándentro de la aplicación. Para esto seráá necesario que vayas a Más>>Configuración>>Perfil. Esta seráá la pantalla que encontrarás si estás usando Waze con un usuario temporal.

Twitter:
La siguiente pantalla que recibirás seráá la pantalla de Twitter. Aquíí podrás conectarte a tu cuenta de Twitter (opciónal). Al estar conectado a Twitter, podrás enviar reportes en vivo, tuyos o de tu grupo directo, a tu cuenta en Twitter (para más información ve “Grupos”).

Recibir PING\ Chat con usuarios:
La siguiente pantalla que recibirás seráá la de “Recibir Ping”. Aquí podrás decidir si quieres recibir\enviar mensajes de texto de y hacia otros usuarios.

Facebook:
La siguiente pantalla que recibirás seráá la pantalla de Facebook. Aquíí podrás conectarte a tu cuenta (opciónal). Al estar conectado a Facebook, podrás ver a tus amigos que usan Waze.

Pulsa el botón de conectar para conectarte, pulsa en el botón ![]() , y verás la siguiente pantalla:
, y verás la siguiente pantalla:

Una vez finalizado el proceso de registro, recibirás el siguiente mensaje:

Pulsa en ![]() y verás la pantalla principal:
y verás la pantalla principal:
Pantalla principal:
Esta es la pantalla principal de la aplicacion.

La pantalla principal de Waze tiene las siguientes secciones:
- La pantalla principal.
- El centro de la pantalla.
- La Barra inferior.
Barra superior:
En la barra superior de la pantalla encontraras 6 diferentes iconos:
GPS: El icono de GPS representa el nivel de recepcion de la señal de GPS a tu celular.
| Verde: recepcion alta. | |
| Naranja: recepcion baja. | |
| Gris: Sin recepcion. |
Internet: El icono de Internet representa si Waze esta conectado a la red o no.
| Azul: Conectado. | |
| Gris: Sin coneccion. |
Estado de animo:
| El icono de estado de animo, representa el animo tuyo mostrado a los de mas wazers en el mapa. |
Grupos:
| Dentro del icono de Grupos podras encontrar todos los reportes y alertas enviadas por los miembros de grupos de los cuales formas parte. |
Informacion en vivo:
| aqui podras ver los informes en directo de eventos en tu zona o ciudad, en tu camino o que hayan sido reportados por alguno de tu grupo. |
Salida:
| Dentro de este icono podras salir de la aplicacion de forma correcta. |
El centro de la pantalla:
El centro de la pantalla principal muestra de forma predeterminada el mapa de la zona con tu ubicación actual.
Puedes cambiar la visualización del mapa de varias maneras:
- ZOOM (IN
 OUT
OUT  ): Toca la pantalla (un toque corto) para abrir el menú lateral. En este menú, podrápodrás cambiar la visualización del mapa a través de los botónes de zoom in y zoom out.
  Pavimentadora: dentro del menú lateral también verás una pavimentadora amarilla. Si pulsas este ícono podrápodrás pavimentar nuevas calles que no existen en el mapa. Para dejar de pavimentar sólo tienes que volver a pulsar en el ícono del tractor.
- Arrastrar: tambiénTambién puedes arrastrar el mapa con tu dedo para colocarlo en la posición en que deseas visualizarlo.
- 3D\2D: Es posible determinar la visualización del mapa en modo 3D o en modo 2D.


Crear ruta de viaje entre dos puntos en mapa:
Es posible crear una ruta de viaje entre dos puntos diferentes del mapa. Lo que uno tiene que hacer es un toque largo en uno de los puntos deseados del mapa.
A través del toque largo el siguiente mensaje aparecerá en la pantalla:

Lista de rutas:
Aquí encontrarás rutas alternativas hacia tu destino (difieren en tiempo y distancia):

Puedes compararlas visualmente pulsando ![]()
| Route 1 | Route 2 |
|---|---|

|

|
| Route 3 | All Together |

|

|
Para ver la lista de navegacion, pulsa en ![]() la barra verde que se encuentra en la parte inferior de la pantalla principal
la barra verde que se encuentra en la parte inferior de la pantalla principal

Esto te mostrará el siguiente mensaje:

Si pulsas en “Lista de navegación” verás la siguiente pantalla:


Aquí, verás de forma más detallada tu ruta de viaje.
La barra inferior:
En la barra inferior de Waze encontrarás cuatro botónes que te darán acceso a todas las funciónes de Waze.
![]()
- - Mi ubicación
- - Navegar
- - Reportar
- - Más
1.- Mi ubicación:
| Al pulsar este botón mostrará tu ubicación actual en el mapa con un ícono que. |
epresenta tu vehículo,![]() , (puedes cambiar el ícono de tu coche a través de más>>Configuración>>PERFIL>>ELIGE TU VEHICULO). Este es el estado por defecto de la pantalla principal de Waze siempre que dispongas de conexión GPS en tu ubicación actual (ícono GPS verde o anaranjado en la barra superior). Cada vez que el ícono del auto se pierde, pulsa “Mi ubicación” para actualizar en el mapa tu ubicación actual. Si no dispones de una buena señal GPS (ícono GPS gris), el botón “Mi ubicación” no se podrá utilizar.
, (puedes cambiar el ícono de tu coche a través de más>>Configuración>>PERFIL>>ELIGE TU VEHICULO). Este es el estado por defecto de la pantalla principal de Waze siempre que dispongas de conexión GPS en tu ubicación actual (ícono GPS verde o anaranjado en la barra superior). Cada vez que el ícono del auto se pierde, pulsa “Mi ubicación” para actualizar en el mapa tu ubicación actual. Si no dispones de una buena señal GPS (ícono GPS gris), el botón “Mi ubicación” no se podrá utilizar.
| El botón “Navegar” te ayudará a encontrar la mejor ruta a un lugar, y para acceder a lugares que has buscado o se han guardado en el pasado. Al pulsar el botón aparecerá el siguiente menú; |

Este menú contiene las siguientes opciónes:
- Nueva dirección
- Mis favoritos.
- Historial
- Lugares guardados
- Contactos
Nueva dirección:
![]() Al pulsar esta opción se visualizará un teclado virtual en la pantalla para escribir la dirección. Introduce la dirección a la que deseas llegar, y Waze la buscará. Aparte de eso Waze te dará direcciones\calles similares cerca de tu destino.
Al pulsar esta opción se visualizará un teclado virtual en la pantalla para escribir la dirección. Introduce la dirección a la que deseas llegar, y Waze la buscará. Aparte de eso Waze te dará direcciones\calles similares cerca de tu destino.

Para hacer otra acción con el resultado obtenido, pulsa la flecha ![]() junto al nombre. Esto te llevará al siguiente menú:
junto al nombre. Esto te llevará al siguiente menú:

Aquí podrápodrás elegir entre las siguientes opciónes:
- Navegar: Aquí podrás calcular la mejor ruta al punto de destino.
- Mostrar en el mapa: Waze te muestra la ubicación de tu destino en el mapa, pero no calculará la mejor ruta hacia él.
- Agregar a favoritos: Aquí podrás agregar el punto de destino a tu lista de favoritos. Primero Waze te pedirá que le des un nombre corto a esta ubicación. Pulsa “hecho” para añadir esta ubicación a tu lista de favoritos con este nombre. Regresará a la pantalla principal. La próxima vez que accedas a tus favoritos, la ubicación guardada estará allí. Ten en cuenta que si eliges esta opción, la ubicación no aparecerá en tu historial de búsquedas, ya que no fue mostrada en el mapa previamente.
Mis favoritos:
 En tu lista de favoritos podrá encontrar las ubicaciones guardadas anteriormente.
También aquípodrás encontrar un botón con una flecha ![]() junto al nombre de cada una de tus ubicaciones favoritas. Este botón te llevará al siguiente menú:
junto al nombre de cada una de tus ubicaciones favoritas. Este botón te llevará al siguiente menú:
Aquí podrás elegir entre las siguientes opciones:
- Conducir: Aquí podrás calcular la mejor ruta al punto de destino.
- Mostrar en el mapa: Waze te muestra la ubicación de la dirección en el mapa.
- Borrar: De aquí podrás eliminar esta ubicación de tus favoritos.
Historial:
![]() En tu Historial podrás encontrar las ubicaciones buscadas anteriormente.
En tu Historial podrás encontrar las ubicaciones buscadas anteriormente.

ambién aquípodrás encontrar un botón con una flecha ![]() junto al nombre de cada una de las ubicaciones guardadas en tu historial. Este botón te llevará al siguiente menú:
junto al nombre de cada una de las ubicaciones guardadas en tu historial. Este botón te llevará al siguiente menú:
Aquí podrás elegir entre las siguientes opciones:
- Conducir: Aquí podrás calcular la mejor ruta al punto de destino.
- Mostrar en el mapa: Waze te muestra la ubicación de tu destino en el mapa.
- Borrar: eliminará esta ubicación de tu lista de lugares guardados.
- Agregar a favoritos: agregará este punto a tu lista de favoritos.
Lugares guardados:
 En tu lista de lugares guardados podrás encontrar las ubicaciones guardadas anteriormente.

También aquí, podrás encontrar un botón con una flecha ![]() junto al nombre de cada una de las ubicaciones guardadas en esta lista. Este botón te llevará al siguiente menú:
junto al nombre de cada una de las ubicaciones guardadas en esta lista. Este botón te llevará al siguiente menú:
Aquí podrás elegir entre las siguientes opciones:
- Conducir: Aquí podrás calcular la mejor ruta al punto de destino.
- Mostrar en el mapa: Waze te muestra la ubicación de tu destino en el mapa.
- Borrar: eliminará esta ubicación de tu lista de lugares guardados.
- Agregar a favoritos: agregará este punto a tu lista de favoritos.
Cómo guardar una ubicación
Para guardar una ubicación en esta lista, hay que dar un toque largo dentro del mapa, en la ubicación exacta que quieres que se guarde. Ahí pulsa “Guardar Lugar”.
Al hacer esto Waze te pedirá que le des un nombre a esta ubicación.

Contactos:
![]() Si pulsas en el botón de “Contactos”, aparecerá tu lista interna de contactos. Si seleccionas un contacto que contiene la dirección del mismo podrás navegar a ella.
Si pulsas en el botón de “Contactos”, aparecerá tu lista interna de contactos. Si seleccionas un contacto que contiene la dirección del mismo podrás navegar a ella.
Para cancelar la navegación actual o ver la lista de navegación en la que te encuentras da un toque largo en el mapa o pulsa en la barra verde que se encuentra en la parte inferior de la pantalla.
![]()
Esto te mostrará el siguiente mensaje:

Aquí, puedes elegir silenciar el programa, cancelar la navegación o ver la lista de navegación.
Si pulsas en “Lista de navegación” verás la siguiente pantalla:

Aquí, verás de forma más detallada tu ruta de viaje.
3.- Reportar:
![]() Aquí podrás reportar eventos a toda la comunidad y a tus grupos. Seleccionando el botón “Reportar” visualizarás el siguiente menú:
Aquí podrás reportar eventos a toda la comunidad y a tus grupos. Seleccionando el botón “Reportar” visualizarás el siguiente menú:


Reportar es tan fácil como elegir el tipo de evento y pulsar “enviar”. El evento será marcado automáticamente en la ubicación en que te encontrabas al momento de reportar el evento.


Los tipos de eventos que puedes reportar son:
- PolicíaTráfico
- Accidente
- Peligro
- Radar de velocidad
- Chit-Chat
- Actualizar mapa
- Check in con FourSquare
Policía:
![]() Pulsando en el ícono de “Policía” verás la siguiente pantalla:
Pulsando en el ícono de “Policía” verás la siguiente pantalla:

En esta pantalla podrás indicar de qué lado de la vía ha ocurrido el evento, dar una descripción corta sobre el evento y agregar una fotografía del mismo.
Tráfico:
![]() Pulsando en el ícono de “tráfico”, verás la siguiente pantalla:
Pulsando en el ícono de “tráfico”, verás la siguiente pantalla:

En esta pantalla podrás indicar de qué lado de la vía ha ocurrido el evento, dar una descripción corta del evento y agregar una fotografía del mismo.
Accidente:
![]() Pulsando en el ícono de “Accidente” verás la siguiente pantalla:
Pulsando en el ícono de “Accidente” verás la siguiente pantalla:

En esta pantalla podrás indicar de qué lado de la vía ha ocurrido el evento, dar una descripción corta del evento y agregar una fotografía del mismo.
Peligro:
![]() Pulsando en el ícono de “Peligro” verás la siguiente pantalla:
Pulsando en el ícono de “Peligro” verás la siguiente pantalla:

En esta pantalla podrás indicar de qué lado de la vía ha ocurrido el evento, dar una descripción corta del evento y agregar una fotografía del mismo.
Radar de velocidad:
![]() Pulsando el ícono de “Radar de velocidad” podrás colocar alertas sobre cámaras\radares de velocidad en tu vía.
Pulsando el ícono de “Radar de velocidad” podrás colocar alertas sobre cámaras\radares de velocidad en tu vía.
Chit-Chat:
![]() Pulsando en el ícono de “Chit-Chat” verás la siguiente pantalla:
Pulsando en el ícono de “Chit-Chat” verás la siguiente pantalla:
En esta pantalla podrás indicar de qué lado de la vía ha ocurrido el evento, dar una descripción corta del evento y agregar una fotografía del mismo.
Actualizar mapa::
![]() Pulsando en el ícono de “Actualizar Mapa” verás la siguiente pantalla:
Pulsando en el ícono de “Actualizar Mapa” verás la siguiente pantalla:

Aquí podrás registrar nuevas vías, actualizar detalles (como número de casas) y reportar problemás en el mapa.
Check in con FourSquare:
 Pulsando en el ícono de “Check in con FourSquare” verás la siguiente pantalla:


Aquí podrás actualizar los detalles de tu cuenta en FourSquare.
 4.- Más:
Si pulsas el botón de “Más” ![]() aparecerá de inmediato una nueva barra de opciones en la parte superior de la barra inferior de la pantalla principal.
aparecerá de inmediato una nueva barra de opciones en la parte superior de la barra inferior de la pantalla principal.
En este menú habrá tres opciones diferentes:
- Configuración
- Posiciónes.
- Grupos.
Configuración:
![]() Pulsando en el ícono de “Configuración” verás la siguiente pantalla:
Pulsando en el ícono de “Configuración” verás la siguiente pantalla:


Esta es la pantalla de “Configuración”, de aquí podrás cambiar y configurar a tu gusto todas las opciones en Waze. La pantalla está dividida en dos partes:
- Acciones rápidas
- Configuración
Acciones rápidas:
Dentro de “Acciones rápidas” están las siguientes opciones:
- Comandos de voz:

Aquí podrás activar o desactivar los comandos de voz. - Vista:

Aquí podrás cambiar la vista del mapa a 3D o a 2D. - Modo:

Aquí podrás cambiar el modo de visualización del mapa entre día y noche.
Ir a mi reproductor de mapa:
![]()
De aquí, podrás llegar a tu reproductor de música dentro de tu iPhone.
Configuración:
Dentro de “Configuración” están las siguientes opciones:
- Opciones generales:
Dentro de “Opciones generales” encontrarás el siguiente menú:

- Idioma (menú):
 quí, podrás elegir entre los idiomás disponibles en el menú.
- Idioma (menú):


- Idioma (Audio):
 Aquí, podrás elegir entre los idiomás disponibles para la navegación.
- Idioma (Audio):

- Unidad de Distancia:
 Aquí, podrás elegir en qué unidad de distancia deseas trabajar.
- Unidad de Distancia:
- Reloj 24Hrs:
 Aquí podrás activar o desactivar el zoom automático durante la navegación.
- Reloj 24Hrs:
- Zoom automático:
 Aquí podrás activar o desactivar el zoom automático durante la navegación.
- Zoom automático:
- Mostrar puntaje:
 Aquí, podrás activar o desactivar la iluminación de fondo durante la navegación.
- Mostrar puntaje:
- Iluminación de fondo:
 Aquí, podrás activar o desactivar la iluminación de fondo durante la navegación.
- Iluminación de fondo:
- Memorizar automáticamente...:
 Aquí, podrás activar o desactivar la función de memorizar automáticamente tus rutas más frecuentes.
- Memorizar automáticamente...:
- Radio de evento:
 Pulsando en el botón de “Radio del evento”, te mostrará el siguiente menú:
Aquí podrás elegir dentro de qué radio deseas recibir eventos relevantes para tu navegación.
- Radio de evento:

- Notificaciones:
 Pulsando en el botón de “Notificaciones” te mostrará el siguiente menú:
Aquí, podrás elegir qué tipo de notificaciones deseas recibir.
- Notificaciones:

- Perfil:
 Dentro de “Perfil” encontrarás el siguiente menú:


Aquí, podrás conectarte, cambiar y configurar tu cuenta en Waze, FaceBook, Twitter y Foursquare. Aquí también podrás ajustar tu configuración de privacidad dentro de Waze.
- Privacidad::
 Pulsando en el botón de “Ajustes de privacidad” verás el siguiente menú:
 Aquí, podrás configurar tus opciones de privacidad dentro de Waze y de su vinculación con FB y Twitter.
- Privacidad::

- Recibir Ping:
 Aquí, podrás activar o desactivar la función de recibir y enviar Pings.
- Recibir Ping:
- Twitter:
 Pulsando en el ícono de “Twitter” verás la siguiente pantalla:

En esta pantalla podrás acceder a y configurar las diferentes opciones dentro de Twitter.
- Twitter:


- FaceBook:
 Pulsando en el ícono de “FaceBook” verás la siguiente pantalla:

En esta pantalla podrás acceder a y configurar las diferentes opciones dentro de Facebook.
- FaceBook:


- FourSquare:
 Pulsando en el ícono de “FourSquare” verás la siguiente pantalla:

En esta pantalla, podrápodrás acceder y configurar las diferentes opciones dentro de FourSquare.
- FourSquare:


- Elije tu vehiculo:
 Pulsando en el botón de “Elije tu vehiculo” verás el siguiente menú:
- Elije tu vehiculo:


En este menú podrás escoger el vehiculo\icono que te indicara tu posición actual en el mapa.
- Mapa:
 Dentro de “Mapa” encontrarás el siguiente menú:


Aquí, podrás configurar los ajustes generales del mapa.
- Color del mapa:
 Pulsando en el botón “Color del mapa” verás el siguiente menú:
- Color del mapa:


Aquí, podrás elegir el color con el cual visualizarás tu rutas y mapas.
- Uso de datos:
 Dentro de “Uso de datos” encontrarás el siguiente menú:


Aquí, podrás configurar los ajustes generales en el uso de datos.
- Ajustes de ruta:
 Dentro de “Ajustes de ruta” encontrarás el siguiente menú:
Aquípodrás ajustar tus preferencias sobre el tipo de vias que deseas utilizar durante tu navegación en Waze.- Tipo:
 Dentro de “Tipo de ruta” encontrarás el siguiente menú:
Aquí, podrás elegir entre las siguientes opciones. - Vias de tierra::
 Dentro de “Vias de tierra” encontrarás el siguiente menú:
Aquí, podrás elegir entre las siguientes opciones.
- Tipo:


- Grupos:
 Dentro de “Grupos” encontrarás el siguiente menú:
Aquí, podrás ajustar tu configuración preferida en el tema de Grupos dentro de Waze.- Pop-up de reportes:
 Dentro de “Pop-up” encontrarás el siguiente menú:
Aquí, podrás elegir entre las siguientes opciones.
- Pop-up de reportes:


- Corre la voz:
 Dentro de “Corre la Voz” encontrarás el siguiente menú:
Aquípodrás elegir tu forma preferida de correr la voz a tus amigos y conocidos sobre Waze. También podrás calificarnos dentro de AppStore y Chomp.

- Ayuda\Acerca de...:
 Dentro de “Ayuda/Acerca de” encontrarás el siguiente menú de ayuda:
Aquí, podrás recibir ayuda e información elementaria sobre el funcionamiento de Waze. También de aquí podrás enviar tus archivos Log.

Posiciones:
![]() Pulsando en el ícono de “Posiciones” verás la siguiente pantalla:
Pulsando en el ícono de “Posiciones” verás la siguiente pantalla:
Aquí podrás revisar tus puntos acumulados y tu rango dentro de Waze. También podrás revisar la tabla general y los cambios sucedidos últimamente (la tabla general y tu tabla personal se actualizan diariamente).
Grupos:
![]() Pulsando en el ícono de “Grupos” verás la siguiente pantalla:
Pulsando en el ícono de “Grupos” verás la siguiente pantalla:
quí podrás ver a qué grupos perteneces, cuáles son los más populares y cuáles son los más cercanos a tu ubicación.
Igualmente, aquí podrás crear un grupo si así lo deseas. Para crear tu grupo sólo necesitas pulsar en el botón de “Crear Grupo”.
- Crear Grupo:
 Pulsando en el ícono de “Crear Grupo” verás la siguiente pantalla:
Aquí, podrás crear y personalizar tu grupo, darle nombre, descripción y un ícono representativo, así como mantener a tu grupo conectado por medio de Twitter y FaceBook.
Para añadir un ícono, pulsa en el recuadro “Add Icon” ’ y verás la siguiente pantalla:
Escoge uno para seguir el proceso. - Cuenta de Twitter del grupo:Si pulsas el ícono de “Twitter” verás la siguiente pantalla:
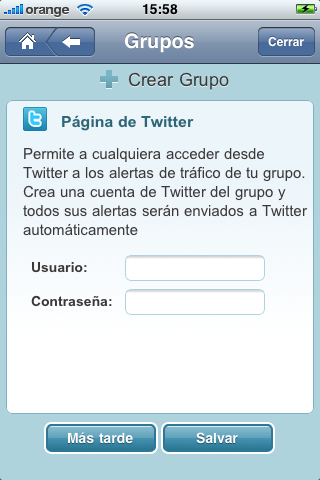
Al unir tu grupo a Twitter, permitirás a cualquiera acceder desde Twitter a las alertas de tráfico de tu grupo. Todas las alertas echas por tu grupo aparecerán en la página de Twitter del mismo. - Facebook Fan page del grupo:Pulsando en el ícono de “Facebook”verás la siguiente pantalla:

Crea una Fan page para tu grupo y así todos los reportes hechos por tu grupo serán visibles en ella.


Symbian Keypad
Downloading the application on the device
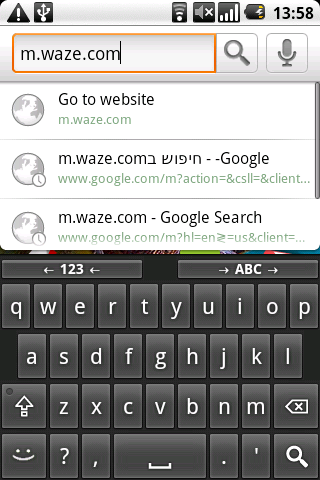
1. In order to download waze, make sure you have an Internet connection (3G or Wi-Fi) available on your mobile. Go to m.waze.com via your phone's internal web browser.

2.Press Ok.

3. Wait until the download is finished.

Install the application on the device
The installation will start after the download is finished.
1. Press Yes

2. Press Continue.

3. Select the type of memory (device/card) you want to install waze on. We recommend you install it on the device memory, for better performance.

4. Wait until the installation is complete.


5. After the initialization process you'll be required to select your location (If the GPS and AGPS are turned off)

6. Read and confirm the license agreement.

7.Create a new account:
If you're a new user - select New user.

Fill in the details below in order to create your account.
You'll be asked to provide a username, password, an email address, and a nickname (optional)
If you choose a nickname, it will be used to identify you on the map and in the reports you send.
- Choose a username. The username is case sensitive, therefore "Jenny" is not the same
as "jenny".
- After you have proceeded to fill in all the form, waze will display the filled-in form
(your password will be displayed as five stars no matter how long it actually is).
- Check the information you've typed in. If everything is in order, select "Create" and a new account will be created.
If not, select the line you want to change, and change the information that fits you best.

Tap "Next" to confirm and enter as a registered user or Skip if you don't want to
register at this moment.
Note that if you select “skip”, a temporary account will be created for you - you can change your account type in the future.
However you will not be able to access waze's web site and points you get during driving will not
be saved!.
Installing the application using Nokia PC Suite
Interactive guide to Nokia PC Suite
1. Download the installation file to your computer from the following link: LINK
Save it on your desktop (you can delete the file later).

2. Press Ok.

3. After this comment, the installation will continue on your phone.

Main screen
After registering, the following screen will appear:

Top status bar
GPS Connectivity - (green means connected , orange means partial coverage, gray is disconnected).
![]()
![]()
![]()
Internet connection status- (gray means disconnected, when connected no icon appears).
![]()
Mood icons- (happy, sad, etc...).
![]()
The smiley shows the mood you're in at the moment. If you've chosen to be visible to
other wazers (green privacy icon), your mood is also displayed to them; and if you've
chosen to tweet your reports to your Twitter followers, they'll see your current mood as
part of the tweet.
Groups
![]()
This icon refers to the number of reports received by the groups you’re registered to.
Reports on the road
![]()
This icon refers to the number of traffic reports and events received by the community.
The main screen
You can select whether to present the map in 2D or 3D:
2D

3D

Clicking on 5 will switch to 3D view. (if you'll press it again it will switch back to 2D).
This state will be added to the map in another dimension - a dimension depth which will
allow wider angle of vision.
Zoom
If you want to zoom-in on the map then press the * button.
If you want to zoom-out on the map then press the # button.
Text buttons on the bottom of the main screen:
- Me on Map (displays where you are right now).
- Menu
- Report (you will get this option when pressing me on map).
- Note - report options will appear only if there is GPS reception and network data connection.
- Note - report options will appear only if there is GPS reception and network data connection.
Report
Clicking on  will open the next menu:


Note - all options will appear only if there is GPS reception and network data connection.
You can choose one of the following events:
Police![]()
Traffic jam![]()
Accident![]()
Hazard![]()
Speed cam![]()
Chit chat![]()
Map update![]()
Police
Clicking on the marker opens the following menu:


You need to choose if it's in your lane or opposite lane. you can change the option
by clicking on My lane or Opposite lane.
(If necessary, you can add a comment or a picture)
Traffic jam
Clicking on the marker opens the following menu:
You need to choose if it's in your lane or opposite lane. you can change the option
by clicking on My lane or Opposite lane.
(If necessary, you can add a comment or a picture).
Accident
Clicking on the marker opens the following menu:
You need to choose if it's in your lane or opposite lane. you can change the option
by clicking on My lane or Opposite lane.
(If necessary, you can add a comment or a picture).
Hazzard
Clicking on the marker opens the following menu:
You need to choose if it's in your lane or opposite lane. you can change the option
by clicking on My lane or Opposite lane.
(If necessary, you can add a comment or a picture).
Speed cam 
When clicking on the marker ![]() the following menu will appear:
the following menu will appear:

Press Ok only if it's on your lane.
Map update 
Clicking on the marker opens the following menu:

Clicking on the icon ![]() will enable you to record roads.
will enable you to record roads.
To cancel recording, press the same icon again. ![]()
 House number
Here you can update house numbers of your current position.
Pressing on the icon it will enable you to update house numbers.
![]() Map error
Map error
Here you can report a map error and add a description.
Clicking this icon Will open the following window:

Map problem categories are:
Incorrect turn - the map shows that you can make a turn at that point which in fact
isn't allowed.
Incorrect address – the name of the street is incorrect.
Incorrect route – the navigation instructions here are incorrect.
Missing Roundabout- when there is a need for a round about in your area.
Missing Roads- when there are roads that are missing.
General Map Error - here you'll key in the details before you press Send.
After you press Send you get a message that the report was sent correctly.
Menu
Drive to
In order to navigate you need to press the Drive to option in the menu:

You will get the following screen:

Please note! The quickest way to navigate to the address is to keep it in favorites.
Address or Place
You may enter the name of a road, an address, a place name or keywords. Waze
is smart and will show you a list of matches in order based on importance and relevance
After choosing the "Address or Place" option you will get the following screen:

My favorites
Add to favorites
Adding an address to favorites allows quick access to common addresses defined by the user.
in order to add an address to the favorites you need to place the address in the "Drive to" search bar:
Press Ok.
Choose the option form the list:
After tapping "ok" the following screen appears:

Choose the Add to favorites option and write the favorite name.
Press Ok (it will be saved).
Select a favorite and navigate
Go to menu press on Drive to then press on My favorites:

Choose the preferred option from the list:

Recent searches
after using "Search address or Place" or by selecting a destination
using the "Location Menu" A list of recent locations you've driven to will appear. The most recent search is at the top.
Note that a place found by a search or by selecting a location on a map
will appear as an address.
Destinations chosen from My favorites or Saved locations are not included in the Recent
searches list.
Press Menu and then Drive to.
Press Recent searches.

After selecting Recent searches, the following screen appears:

The addresses can be added to favorites by clicking options (far left side of the screen)
the following screen appears:

You need to select on the Add to favorite option.
Fill the name and press Yes:

Saved locations
A list of locations saved using the #Location Menu. You can select any location here as your
destination. The most recently saved location is at the top of the list of Saved locations.
To add an address to saved locations, press and hold the desired location on the map the
following screen will appear:

Then select Save location.
The following screen will appear:

Press Name.
And fill in the name.

Press Ok then save.
Then you will reach the following screen appears:

Press on the location you desire, the following screen appears:

On that screen you can select one of the options: Drive, Show on map, Delete, Add
to favorites.
If you want to select from Saved locations you need to do the following:
Press Menu and then Drive to.
Press Saved locations.

After selecting Saved locations, the following screen appears:
After selecting the preferred address name, press Options the following screen appears:
Delete Favorites / Saved locations
To delete an address, press on Menu and Then Drive to.
Select My favorites/Saved locations.
The following screen appears:
After selecting the preferred address name, press Options and then Delete.
Then the following screen appears:

Press Yes.
Stop Navigation
Press Menu and then Stop navigation.

Track details
Press Menu and then Navigation list.

After selecting Navigation list details of the chosen route:

Real-time information
To view real-time information, press Menu and Then Live info.

The menu bar at the top of the screen shows a list of all the reports:

Attention
You can filter the list by police, traffic, accidents and etc with the left and right
arrows at the top of the screen.

Live Info
Settings
The settings allow you to view and personalize your waze experience.
To enter the settings menu click on menu (in the bottom left side of the screen).
you will get the following screen:

Then click on settings the following screen will appear:

You can choose one of the following events:
General
Profile
Map
Routing
Data Usage
Groups
Recommend
Help/Support
General
By clicking on General the following screen will appear:


Measurement system - you can choose to display distances in miles or in kilometers.
Volume Control - to choose the volume level for voice directions.
Auto zoom of maps (on/off) – by default it's "on", so the map will zoom in and out
while you're navigating, based on the distance to your next decision point(e.g. place where
you have to turn). You can disable this feature by selecting "off". Whether to display
the points ticker ("on" to display it, "off" to hide it).
Automatic night mode (on/off) – the default is "on": waze switches between day and
night mode automatically. To disable this automatic switching, choose "off". You
can still switch manually between day and night modes from the main Settings screen.
Backlighting (on/off): by default it's "on", and the backlight will remain on as long as
waze is on.
By clicking the Events Radius the following screen appears:

Profile
By clicking on profile in the settings menu the following screen appears:


It displays your account details: username, five stars representing your password
(no matter how long your password is) and nickname; and lets you change your nickname.
To change your username and password, first go to the waze.com site, log in, and make
the changes, and only then update it on your phone.
It displays a car icon which will represent your car on the map you see.
You can choose from a large number of cars of different types and colors
(more cars coming soon!!)
It displays the icon for your current mood – you can change it to one of the others.
Twitter – lets you choose whether to tweet your waze reports to your twitter followers;
if you choose to do so, enter your Twitter username and password. Your current mood will
be included in the tweet. You can disable and re-enable tweeting at any time without affecting
FourSquare - lets you set up your foursquare account to use with waze, and set tweets about
your foursquare activity.
Map
Here you can adjust which items will be shown on your map: speed cams, other wazers.
By clicking on (map) in the settings menu the following screen appears:


Color map scheme
Allows you to customize the appearance of your map.
When pressing on Color map scheme option the following screen appears:


There you can choose your scheme.
Routing
Here you can tell waze how to calculate the optimal route for you. The options are:

In the Routing menu press on the option Route preference the following screen appears:

Dirt roads – you can choose to allow their inclusion in your route, to forbid it, or to
allow short ones but avoid long ones where possible. Dirt roads may be shortcuts,
but sometimes a driver doesn’t take into account the length of the dirt road.
In the Routing menu press on the option Dirt roads the following screen appears:

Data Usage
By clicking on Data usage option in the settings menu the following screen appears:

When you are near a WIFI connection we advise you to perform a full map
download which will later reduce you data usage since the information downloaded
to your phone will update existing tiles, while data that hasn’t been changed.
Groups
By clicking on (Groups) in the settings menu the following screen appears:

Pop-up reports
In the Groups menu press on the option Pop-up reports the following screen appears:

Wazers group icons
In the Groups menu press on the option Wazers group icons the following screen appears:
The menu will prompt you for three options.
My main group only - After choosing your main group you can define waze to show you
popups from that group only.
The groups I follow - Once Choosing this option the user will be prompted to
pop-ups from all of the groups that he’s registered to.
All groups - This option stops the screening of messages and pops up all of the
groups pop-ups from groups near the user.
Recommend
By clicking on Recommend option in the settings menu you can recommend waze to one of
your friends.
After choosing this option the following screen appears:

Press Yes
Enter the phone number of your friend:

Press Ok

Groups
To view the groups on the map, press Menu and Then Groups:

Attention
The device not supporting the Groups interface, this note will appear after selecting
Groups category.

My points
To watch the information on scoreboard and points ticker press Menu and then
My points:

Then the following screen will appear:

For choosing scoreboard select Scoreboard and for points ticker select the option
Show points ticker:

Then the following screen will appear:

Exit
To exit the program press Menu and Then Exit:

Press Yes.

Symbian Touch
Main screen
When you enter the program the following screen appears:

Icons
On top of the main screen a few icons appears:
Tracking satellites - (green connected , orange partial coverage, gray is disconnected).
![]()
![]()
![]()
Connection Status (gray disconnected,blue connected).
![]()
![]()
Mood icons (happy, sad, etc...).

Groups
![]()
Reports on the road

Exit

Zoom
If you want to zoom-in on the map then press on the + button on the screen (it will be
shown when you touch on the screen once):

If you want to zoom-out on the map then press on the - button on the screen (it will be
shown when you touch on the screen once).
Mood
If you would like to change your mood status you need to press on the mood icon on the
top of the screen you will get the following screen:

Select the mood by pressing on it.
Report
Clicking on report option the following screen will appear:


On the bottom of the main screen:
Me on map

Report

Note - report options will appear only if there is GPS reception and network data connection.
Search

More

Note - all options will appear only if there is GPS reception and network data connection.
You can choose one of the following events:
Police
Traffic jam
Accident
Hazard
Speed cam
Chit chat
Map update
Police
Clicking on the marker opens the following menu:

For the opposite lane you need to press on the option My direction.

After selecting the lane press Send.
You need to choose if it's in your lane or opposite lane.
(If necessary, you can add a comment or a picture).
There is the possibility to add a comment by clicking on the ![]()
The following screen will appear:

Fill in the information then Done.

Then press Send.
Traffic jam
Clicking on the marker opens the following menu:

For the opposite lane you need to press on the option My direction.

You need to choose if it's in your lane or opposite lane.
(If necessary, you can add a comment or a picture).
There is the possibility to add a comment by clicking on the ![]()
The following screen will appear:
Fill in the information then Done.
Then press Send.
Accident
Clicking on the marker opens the following menu:

For the opposite lane you need to press on the option My direction.

You need to choose if it's in your lane or opposite lane.
(If necessary, you can add a comment or a picture).
There is the possibility to add a comment by clicking on the ![]()
The following screen will appear:
Fill in the information then Done.
Then press Send.
Hazard
Clicking on the marker opens the following menu:

For the opposite lane you need to press on the option My direction.

You need to choose if it's in your lane or opposite lane.
(If necessary, you can add a comment or a picture).
There is the possibility to add a comment by clicking on the ![]()
The following screen will appear:
Fill in the information then Done.
Then press Send.
Speed cam
Clicking on the marker opens the following menu:

Press Yes.
There is the possibility to add a comment by clicking on the ![]()
The following screen will appear:
Fill in the information then Done.
Then press Send.
Chit chat
Clicking on the marker opens the following menu:

For the opposite lane you need to press on the option My direction.

You need to choose if it's in your lane or opposite lane.
(If necessary, you can add a comment or a picture).
There is the possibility to add a comment by clicking on the ![]()
The following screen will appear:
Fill in the information then Done.
Then press Send.
Map update
Clicking on the marker opens the following menu:

then the following screen will appear:

To cancel recording, press on:![]()
Then press on the Stop recording roads.
After that the following screen will appear:

Map error
Pressing on the icon ![]() at the map updating option you can choose the type of
at the map updating option you can choose the type of
problem and add details about it.

Click Send to send the report to the server and the other users afterwards
confirmation message will appear.

Please note! If the navigation device is not connected the following error appears
and will not allow sending reports.
House number
Pressing on the icon it will enable you to update the house number and
he following window will appear:

Pressing on the right arrow you will able do change the house number:

Press Done.
Then press Ok.
Menu
To enter the settings menu click on More (in the bottom of the screen)
you will get the following screen:

Then click on settings the following screen will appear:

You can choose one of the following events:
Navigation guidance(on/off)
Light(day/night)
General
Profile
Map
Groups
Routing
Data Usage
Recommend
Help/Support
General
By clicking on General option the following screen will appear:

By clicking the Events Radius option the following screen appears:

Profile
By clicking on profile option in the settings menu the following screen appears:

Map
By clicking on map option in the settings menu the following screen appears:

Color map scheme
When pressing on Color map scheme option the following screen appears:

There you can choose your scheme by clicking on the option.
Groups
By clicking on Groups option in the settings menu the following screen appears:

Pop-up reports
In the Groups menu press on the option Pop-up reports the following screen appears:

Wazers group icons
In the Groups menu press on the option Wazers group icons the following screen appears:

Routing
By clicking on Routing in the settings menu the following screen will appear:

Route preference
In the Routing menu press on the option Route preference the following screen will appear:

Dirt roads
In the Routing menu press on the option Dirt roads the following screen will appear:

Data Usage
By clicking on Data usage in the settings menu the following screen will appear:

Recommend
By clicking on Recommend option in the settings menu the following screen will appear:

Press Yes.
Enter the phone number of your friend:

Press Ok.

Help/Support
By clicking on Help/Support option in the settings menu the following screen will appear:

Select Send logs.

Press Yes.
Drive to
In order to navigate you need to press on the Search option in the bottom of the
screen you will get the following screen:

Press the Search address or Place bar and you will get the following screen:

Fill in the address and click on Search.

Select from the list the relevant address the following screen will appear:

Than press on the arrow of the option.

Select the Drive option
Please note! The quickest way to navigate to the address is to keep it in favorites.
My favorites
Add to favorites
Adding an address to favorites allows quick access to common addresses as defined by the
user in advance.
Press on the Search option in the bottom of the screen you will get the following
screen:
Press the Search address or Place and you will get the following screen:
Fill in the address and click on Search.

Select from the list the relevant address.
After selecting the address press on the arrow on the address you selected.

Than you will get the following screen:
Select the Add to favorites option.
Write the name of the favorite and press Done:

Select a favorite and navigate
Press on the Search option in the bottom of the screen you will get the following
screen:
Select My favorites:

Select the required favorite:
After selecting the address press on the arrow on the address you selected.

Select Drive.
Recent searches
This screen displays and allows quick access to the latest addresses which have
been marked by the user.
You need to select the option:
Press Search and then Recent searches.
Press Recent searches the following screen will appear:
Select one of the Recent searches from the list:

After selecting the address press on the arrow on the address you selected.

Select Drive.
Saved locations
To add an address to saved locations, press and hold the desired location on the
map the following screen will appear:

Then select Save location
The following screen will appear:

Press on Name
And fill in the name

Press Done.

Press Save.
If you want to select from Saved locations you need to do the following:
Press Search then press Saved locations:
Press on the location you desire from the list:

Delete Favorites / Saved locations
Delete a favorite
To delete an address, press on Search and Then My favorites
the following screen appears:
Press on the arrow at the right side of the favorite you want to delete.
Then press Delete and the following screen appears:

Press Yes.
Delete a saved location
To delete an address, press on Search and Then Saved locations
the following screen appears:

Press on the arrow at the right side of the favorite you want to delete.

Then press Delete and the following screen appears:

Press Yes.
When navigating you will need to press on 
that is on the bottom of the screen ![]() and then the next screen will appear:
and then the next screen will appear:

Press Stop navigation.
Track details
When navigating you will need to press on
that is on the bottom of the screen ![]() and then the next screen will appear:
and then the next screen will appear:
Press Navigation list.
The the screen shows a list of all turns:

Real-time information
To view real-time information, press on the groups icon ![]() and Then on the
arrow on the top of the screen
and Then on the
arrow on the top of the screen 
The the screen shows a list of all the reports:

Attention
You can filter the list by police, traffic, accidents and etc by clicking on one
of the options.
Groups
To view the groups on the map, press More.

Press Groups.
Attention
The device not supporting the Groups interface, this note will appear after
selecting Groups category.

My points
To watch the information on scoreboard press More and then Scoreboard:
The following screen will appear:

Exit
To exit the program press on the exit icon and Then Turn off:

Android
Download waze
In order to download waze, make sure you have an Internet connection (3G or Wi-Fi) on your mobile.
Download waze to your Cellphone
- Go to m.waze.com via your phone's internal web browser or search for waze in the Android Market: (If you download from m.waze.com, you can skip to step 3)
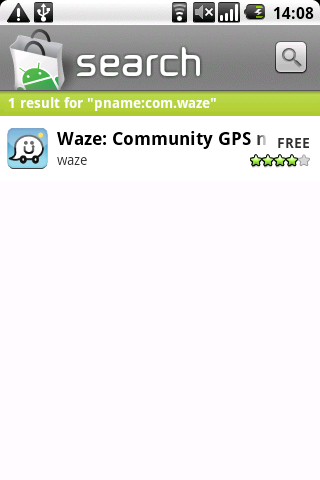
- Search for Waze


- Select waze from the search results

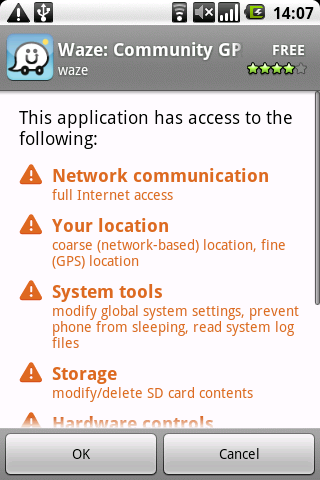
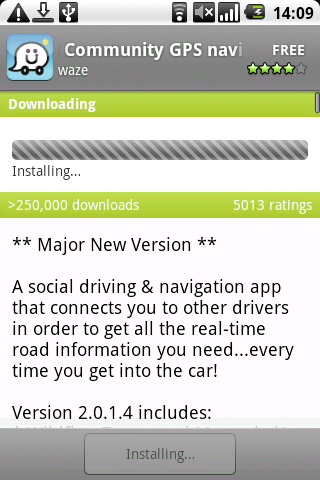
- Tap Install to start the download

- Tap OK to confirm the Notifications:

- After couple of seconds you'll see the next screen, tap waze: Community GPS to see downloading progress.
- Download progress:


- Note: If you want to cancel the downloading, just tap Cancel download
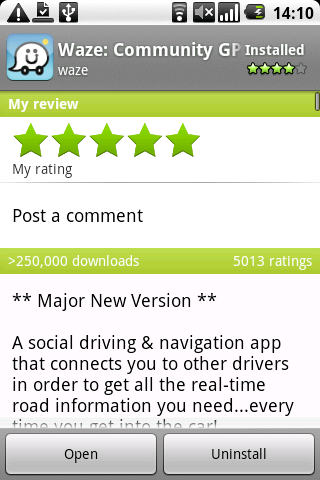
Installing Waze
The installation will start after downloading is finished.
- Installation Progress:
- After the installation ends, tap Open in order to start the installation use or Uninstall to remove waze from your device.


Getting started
Waze splash screen:

- Initialization and first time running
- Select your location
- Terms of use
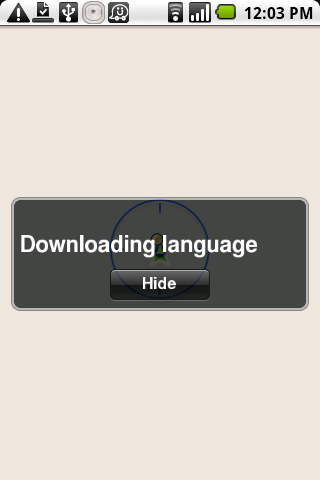
- Select your language
- Sign up
Initialization and first time running

- Initializing:

- If GPS or AGPS are off on your mobile settings you'll get the next message:


Select your location
- After the initialization you'll be required to select your location (If the GPS and AGPS are turned off):
- Language files will be downloaded according to the selection :


Terms of use
After that Terms of use will be presented:

In order to proceed you need to confirm that you understand and accept those terms of use.
Click the Accept button to continue to use waze, or the Decline button to exit the program.
If you have accepted the terms of use, you will next get a form to create your account.
Select your language
- Select your language:
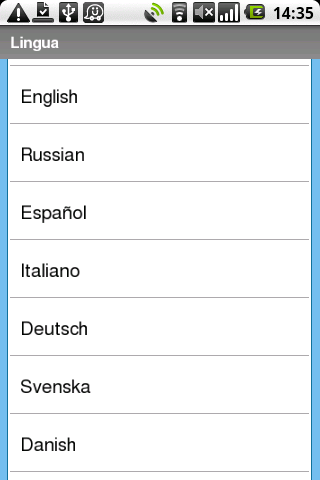

- After choosing the language the Login screen will be displayed:

Sign up
Create an account
1. If you're a new user at waze, tap New user.
- 1.1 Fill out the details below in order to create your account:

You'll be asked to provide a username and password, an email address, and optionally to choose a waze nickname, which is used to identify you on the map and in reports you send, should you choose to be identified.
- Select the username you'd like. The username is case dependent so Jenny is not the same as jenny.
- After you have proceeded to fill in all the form, waze will display the filled-in form (your password will be displayed as five stars no matter how long it actually is).
- If the information is the way you want it, select Create in order to create your account. If not, select the line you want to change.
- 1.2 Tap Next to confirm and to enter as a registered user or Skip if you don't want to register at this moment.
- Note that if you select “skip”, a temporary account will be created for you If you skip the registration.
- You will not be able to access waze's web site and points you get during driving will not be saved!

Existing user
- If you already have a waze account, tap Get Started.
- Enter your Username and Password and tap Log in.

You can also enter your twitter account details. Your routes and / or road reports will be tweeted automatically from your account according to your settings.

Way to go!
1. Way to go! Congratulation you have a new WAZE account.

2. Read or skip the information about waze:

3. Welcome to waze's main screen:

4. 2D (2D and 3D should appear in the settings part)

5. 3D- Depth dimension will be added to the map in this mode.

Menues

| Position from right to left | Description | Name | Icon | Other Modes |
|---|---|---|---|---|
| Top of the screen | ||||
| #1 | Denotes the level of the GPS reception | GPS Reception | ||
| #2 | Denotes whether the phone is connected to the internet via Wi-Fi or Cellular Network | Internet Connection | ||
| #3 | Mood icons. You can choose from a variety of options. | Mood | ||
| #4 | View all the groups that you are following. | Groups | ||
| #5 | View ll the events that have been reported by your groups, that have been reported on your route or that have been reported near to you. | Live info | ||
| #6 | Some details about the application, including the version number. | About | ||
| Bottom of the screen (Main menu) | ||||
| #1 | Tap here to drive to an address, to a favorite address and history drives. | Drive |  |
|
| #2 | Configure or change waze's settings. | Settings |  |
|
| #3 | View groups or scoreboard. | More |  |
|
| Second row | ||||
| #1 | Shows you on center of the map. | Me on map |  |
|
| #2 | Tapping here will close waze. | Exit |  |
|
| #3 | Tapping here will alow to report about different things during the driving. | Report |  |
|
| Center of the Screen- Half transparent and will disappear after 5 seconds | ||||
| #1 | Zooms out the map | Zoom out |  |
row 3, cell 5 |
| #2 | row 3, cell 2 | Zoom in |  |
row 3, cell 5 |
| #3 | row 3, cell 2 | Align North |  |
row 3, cell 5 |
| #4 | row 3, cell 2 | Update map |  |
row 3, cell 5 |
Detailed Operating
Top Screen icons
GPS reception and Internet connection
Tapping ![]() or
or ![]() icons will show the next screen:
icons will show the next screen:

![]() Means you have good connectivity and your location is known.
Means you have good connectivity and your location is known.
![]() Means a low-power connection, until it improves only your rough location is known.
Means a low-power connection, until it improves only your rough location is known.
![]() Means your GPS connection is bad or non-existent, and your location is unknown. To improve it, try to give your phone a clear line of sight to the sky and wait a few minutes.
Means your GPS connection is bad or non-existent, and your location is unknown. To improve it, try to give your phone a clear line of sight to the sky and wait a few minutes.
Select your mood
Tapping ![]() allows to change your mood:
allows to change your mood:

![]() - you’re happy – other wazers will see your avatar on the map as
- you’re happy – other wazers will see your avatar on the map as ![]()
![]() - you’re sad – and your avatar
- you’re sad – and your avatar ![]()
![]() - you’re tired – and your avatar
- you’re tired – and your avatar ![]()
![]() - you’re mad – and your avatar
- you’re mad – and your avatar ![]()
![]() - you’re bored – and your avatar
- you’re bored – and your avatar ![]()
![]() - you’re starving – and your avatar
- you’re starving – and your avatar ![]()
Groups
Tapping ![]() will allow to view your groups:
will allow to view your groups:

Tap Around me to view groups' report in your area:

Tap On route to view groups' reports on current route:

Tap My Groups to return to Groups screen and tap OK to view your grroups:

Live info
Tapping ![]() will show all Live info.
This is an exclamation point together with a small number representing the number of events that have been reported in your area. As long as you have Internet connectivity this number is constantly updated. To view details of these reports, tap the Events button at the bottom of the screen.
will show all Live info.
This is an exclamation point together with a small number representing the number of events that have been reported in your area. As long as you have Internet connectivity this number is constantly updated. To view details of these reports, tap the Events button at the bottom of the screen.
If you've stopped, the reports will also be displayed in rotation on the main screen, on your map.

Simply by driving around with waze running on their smartphones, drivers share real-time information that waze translates into road and traffic conditions. You can also actively report to the community on traffic, accidents and incidents, speed cameras, police traps, blocked roads and more. These are called "events". This information about events is collected and analyzed in real time to provide all wazers with the optimal route to their destination at any given moment.
The Events button displays a menu, organized by type of event, of the real-time live reports by wazers about problems in your area:
- All -
 gives you a list of all events reported in your area, listed by distance
 - Police -
 displays only reports of police cars/traps , listed by distance
 - Traffic -
 displays only reports of traffic loads in your area (light / moderate / heavy / standstill) listed by distance
 - Accidents -
 displays only reports of accidents in your area.
 - Chit Chats -
 displays the chat and allow to add a comment:
 - Other -
 any reports of events that aren't in one of the above 3 categories.
From the list of displayed events, you can:
- Tap on the event to display its location on the map together with the full text of the report. To add your own comment to the report of this event (where allowed): tap on the Comment button that appears under the text of the report. You'll get a virtual keyboard: type in your comment and press Done. Your comment will also be sent directly to the wazer who reported the event originally. If he or she replies, you'll get a message on your screen: "responding to you" with his or her reply.

- Tap the arrow beside an event to bring up a menu of possible actions:
- Show on map (the same option as touching the report of the event rather than the arrow beside it)
- Report irrelevant – if you're in that location and the event reported no longer exists there
- Add comment – brings up the virtual keyboard; type in your comment and then press Done.
- Sort by recency - if you would rather see results by chronological order (latest first).
About
Tapping the ![]() icon will show you a little details about your current waze version:
icon will show you a little details about your current waze version:

Bottom Screen Icons
Drive to
Drive to- Search or choose an address to drive to.

- Search address or place- You may enter the name of a road, an address, a place name or keywords. Waze is smart and will show you a list of matches in order based on the closest and importance of the place. If there are few matches, a Google Local Search will be used. So you can search for "toy shop" or "gas station" and Waze will let you select from the closest matches. You don’t have to enter a city but if your destination is not in your current city, you might want to enter a city as well. If Waze does not know the house numbers on your destination road, or you don't enter a house number, Waze will choose the middle of the road.
Search results:

After getting the results you can select one of the folowing:
Drive
Select as your destination. After selecting this option, Waze will suggest you an optimal route to your destination, considering different factors like Traffic jams and hazards.
Show on map
Centers the map display on the location
Add to favorites
You have the choice of entering a name for the favorite. If you select Done this location will be added to the end of your My favorites list.
My Favorites- This is a list of saved locations that you chose to add to favorites. You can select any location here as your destination. This list is sorted based on how recently and frequently you selected the favorite as a destination.
Recent Searches- A list of recent locations you selected after using search address or place or selecting a destination using the location menu. The most recent search is at the top.
Note: Destinations chosen from my favorites or saved locations are not included in the Recent Searches list.
Saved Locations- A list of locations saved using the location Menu. You can select any location here as your destination. The most recently saved location is at the top of the list of Saved locations.
Settings
Settings: allow you to view and personalize your waze experience.

- Navigation guidance (on/off)- whether you want voice instruction in addition to the map display when following a route.
- Display – to display the map in either 2D (default) or 3D.
- Light – whether the screen lighting should be adjusted for day or night viewing. By default, the display will automatically switch to night mode when it gets dark. You can choose to keep this option manual by setting "automatic night mode" to Off from the General settings menu.
- General
- Profile
- Privacy
- Twitter (settings)
- Foursquare
- Car
- Map
- Map color scheme
- Groups
- Routing
- Data Usage
- Recommend
- Help/Support
General

- Language - allow you to change the language of the system.
- Prompts - allows you to change the language of the navigation instructions.
- Measurement system – you can choose to display distances in miles or in kilometers.
- Back light on – by selecting "on", the backlight will remain on as long as waze is running.
- Auto zoom - by default it's "on", so the map will zoom in and out while you're navigating, based on the distance to your next decision point (e.g. place where you have to turn). You can disable this feature by selecting "off".
- Show points ticker - Whether to display the points ticker
- 24 hour clock – allows you to choose between 24/12 hour clock.
Auto learn routes to your frequent destination -
Profile
Profile: Displays your account details

- User name
- Password- five stars representing your password (no matter how long your password is).
- Nickname
Note: To change your username and password, first go to the waze.com site, log in, and make the changes, and only then update it on your phone.
Privacy

This menu displays a screen headed "Display my location on mobile and web" . Waze always respects your privacy, and your location will never be shared against your will. This is where you define the degree of privacy you'd like:
- Anonymous: your location is shown but not your identity (neither username nor nickname): you appear as an "anonymous user". This is the default. The top Status bar shows this by displaying your avatar in blue with a question mark on it.
- Nickname: other wazers will see your location on the map, and your avatar will display your current mood (as described regarding the Status bar avatar, above). If you've chosen this option, your status bar displays a green avatar.
Twitter (settings)
Twitter lets you choose whether to tweet your waze reports to your twitter followers; if you choose to do so, enter your Twitter username and password. Your current mood will be included in the tweet. You can disable and re-enable tweeting at any time without affecting your Twitter credentials.

Additionally, you can configure which reports to publish on your Twitter account:
- My road reports.
- My destination and ETA.
- City & state only.
- House #, Street, City, State.

Additionally, you can configure which reports to publish on your Facebook account:
- My road reports.
- My destination and ETA.
- City & state only.
- House #, Street, City, State.
- My road Munching.
Foursquare
Lets you set up your foursquare account to use with waze, and set tweets about your foursquare activity.

What is Foursquare? It's a cool way to discover and promote cool places in your city and be rewarded for doing so. You can check foursquare and check in to locations around you using waze. First thing you'll need is to create an account on foursquare - this can be done on http://www.foursquare.com Then, make sure you are logged in to waze (with your waze user name) and go to settings >> profile. Under 'Foursquare' enter your foursquare user name and password. Hit back or enter (depending on phone) and wait for the message confirming that you were able to connect to your foursquare account. Note that sometimes it takes a few times before it is able to connect. Once connected, you can use waze and at any given point - when you position is known (GPS icon is green) - you can check in to locations on foursquare. Go to "report" - where you would usually report traffic jams, accidents, etc. - the last option is to check in with foursquare. Choosing this option will bring up a list of all the foursquare locations around you. Click on one to check in to it. Then visit http://www.foursquare.com to see the full details of this check in.
Car
Car: represents your car on the map you see

You can choose from a large number of cars of different types and colors.
Map


Map color scheme

Groups

Tapping Pop-up reports will show the next screen:

Tapping wazers group icons:
Routing

Route preference: Here you can select between fastest or shortest way:

Dirt roads: Here you can choose whether you want waze to navigate you through dirt roads or not:

Data Usage

Tapping Refresh map of my area will delete tiles (sections of the map) in the area, and download it again from the server.
Recommend

Help/Support

Send logs

About

More

Scoreboard


Groups


Create Group

Add icon
Add Group name and Description

Close the message:

Me on map
Me on map – simply centers your car on the screen.

Exit
Exits the application.

Report


Note: All the option will be displayed only if there are GPS reception and Internet Connection.
Police

Select whether the location is on your direction or the reverse direction.
(You can add a comment and an image necessarily).
Traffic jam

Select whether the location is on your direction or the reverse direction. (You can add a comment and an image necessarily).
Accident

Select whether location is on your direction or the reverse direction. (You can add a comment and an image necessarily).
Hazard

Select whether the location is on your direction or the reverse direction. (You can add a comment and an image necessarily).
Speed cam

Note: The speed cam will be added on the position when you tapped Report.
Chit chat

Select whether the location is on your direction or the reverse direction. (You can add a comment and an image necessarily).
Update map

- Record new roads

- To cancel recording of new roads tap
 and choose


- Stopping the recording will show the next screen:

- Update house number
- Report map problem


check-in with Foursquare

Middle Screen Icons
- Zoom In/Out
- Align North
- Update map
Windows Mobile
Installation Guide
First, you need to be sure that your cell phone is connected to the Internet (WI-FI or 3G). In Order to download waze, go to the web site http://m.waze.com, using your phone's browser.
A download screen will appear. Select yes/save as and install the program.
 |
 |
 |
|---|
During this process you will need to select the location you want waze to be saved on. For better performances, we recommended to install the application on your device memory and not on the memory card.
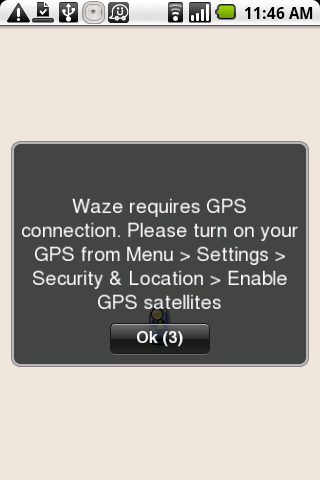
First Time in Waze?
The first time you run the application, you'll get a message that indicates that your WM is looking for a GPS signal.

|

|
|---|
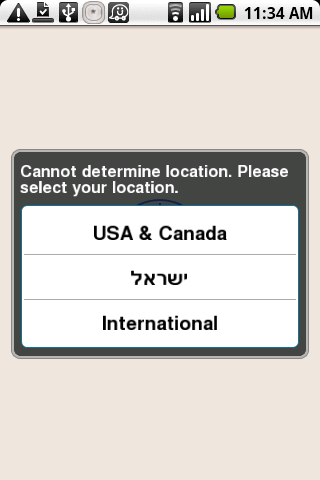
Select Server:
If Waze doesn't recognise your current location, it will ask you to select a sever.
After selecting a server, you'll be asked to select your language:


|

|
|---|
Next, read and accept the waze terms & conditions
 |
 |
 |
 |
|---|
After accepting the using terms, the welcome screen will be displayed:

Choose Sign up to log in, or Sign in to use an existing user name / password (if you already created a waze user in the past). Note: you can also choose to use waze anonymously. Choose sign in at this screen to proceed anonymously.
If you forgot your password, you can visit this page and ask for a password reset: http://www.waze.com/forgot_password/
Creating a new user
After selecting “Sign up”, the following screen will appear.

You'll be asked to provide a username and password, an email address, and optionally to choose a waze nickname, which is used to identify you on the map and in reports you send. Select Next to confirm and to enter as a registered user or Skip if you don't want to register at this moment. Note that if you select “skip”, a temporary account will be created for you If you skip the registration.
NOTE I: If you choose to skip this step and use a temporal user name, you will not be able to access waze's web site and points you get during driving will not be saved!
NOTE II: The “send me updates” box indicates the option to get or not to get update and news mails in your personal mailbox.
In case you select to skip the registration, the following screen will be displayed:

Main Screen
After running the application, you will see following screen:

The top of the screen
The top bar contains six different icons:
![]()
GPS Reception icons:
| connected | |
| Partial connected | |
| No GPS reception. |
Internet connection:
| Connected to Waze | |
| Not connected to Waze |
Mood icon
| Here you can decide in which mood do you want to appear in Waze. |
Groups icon
| Here you can see all the groups that you are following. |
Events
| Here you can see all the events that have been reported by your groups, that have been reported on your route or that have been reported near to you. |
Turn off icon
![]() Here, you can choose between
Here, you can choose between

The center of the screen
In the center of the screen you will see the map. It can displayed in two different modes: 2D\3D.
| 3D mode | 2D mode |
|---|---|

|

|
Zoom: With one simple touch on the center of the screen, the zoom icons in ![]() and out
and out ![]() will appear.
will appear.
The bottom of the screen
In the bottom of the screen you will find four different buttons:
![]()
More
Clicking on ![]() button, you will be able to see the following menu:
button, you will be able to see the following menu:

Go back to The bottom of the screen
Settings
The Settings menu screen is divided in two main groups, Quick actions and Settings.

| Quick actions |
| Navigation guidance |
| Display |
| Light |
| Settings |
| General |
| Profile |
| Map |
| Routing |
| Groups |
| Data Usage |
| Detect GPS |
| Help\support |
Quick Actions
Here you will be able to turn on/off the Navigation guidance.
![]()
Display
Here, you will be able to change between 2D view or 3D view.
![]()
Light
Here you will be able to change between Day/ Night light mode Manually.
![]()
General
Clicking on “general” will give you access to the general settings menu:

Language
![]()
Selecting the language label, will open the following screen:

Here you will be able to change between the interface languages.
Prompts
Here you will be able to change between the voice navigation commands.

Measurement System
![]()
Here you will be able to change between Meters/ Miles.
Clock
![]()
Here you will be able to change between 24 hours clock and 12 hours clock.
Auto Zoom
![]()
Here you will be able to turn on\off the auto zoom.
Show Points Ticker
![]()
Here you will able to turn on\off the points ticker.
Auto-Learns Routes
![]()
Here you will be able to turn on\off the auto-learn routes mode.
Events Radius
![]()
Selecting in the event radius button, will open the following screen.

Here you can select the event radius notifications that you will receive during your trip.
Profile
Clicking on “general” will give you access to the general settings menu:

Here you can login to your account or change to a different account. Also you can choose your privacy settings and to sync waze with different social networks.
Car
![]()
Clicking on Car will give you access to the next window:

Here, you can select your car icon. This icon will show your current position in the map.
 Privacy
Clicking on ![]() will give you access to the next window:
will give you access to the next window:

Here you can decide, if you want that waze show your nickname on the map or not.
I agree to be pinged
![]()
Here you will able to turn on\off the ping permission.
 Twitter
![]()
Clicking on Twitter will give you access to the next window:

In this screen you can logged in to twitter and to set up different settings.
 Facebook
Clicking on Facebook will give you access to the next window:
In this screen you can logged in to Facebook and to set up different settings. If you are not logged in to Facebook, please press “connect” button to log in. Pressing the connect button, an external screen will appear.

 Foursquare
Clicking on Foursquare will give you access to the next window

In this screen you can logged in to Foursquare and to set up different settings.
Map
Clicking on Map will give you access to the General Map Settings Menu:

In this screen you can set up all your map settings, icons and events that you want to see inside your navigation map.
Map color scheme
Clicking on the ![]() button, it will show the following screen:
button, it will show the following screen:

In this screen you can choose the presentation color that you prefer for your map.
 Routing
Clicking on ![]() will give you access to the general routing settings menu:
will give you access to the general routing settings menu:

In this screen you can set up all your routing settings, such as route preference (fastest\shortest), dirt roads (allow\ do not allow) and more.
 Data Usage
Clicking on ![]() will give you access to the general data usage settings Menu:
will give you access to the general data usage settings Menu:

In this screen you can set up your data usage settings.
 Groups
Clicking on ![]() will give you access to the groups settings menu. There, you can set up your preferences for pop-up reports and groups icons.
will give you access to the groups settings menu. There, you can set up your preferences for pop-up reports and groups icons.

Pop-up reports
Clicking on the Pop-up reports label will show you the following screen.

Here you can decide what type of reports are you interest to receive.
Waze group icons
Clicking on the waze group icons label will show you the following screen.

Here you can decide which groups icons are you interest to see on your map.
 Detect GPS
If your cell phone do not receive any GPS signal, please press on the ![]() label to research for a new GPS reception.
label to research for a new GPS reception.
However, if your GPS is already connected. The next message will appear on your screen.

 Help\support
Clicking on ![]() will give you access to Help\Support settings menu. There, you can send logs and get basic information about the current waze version installed in your cell-phone.
will give you access to Help\Support settings menu. There, you can send logs and get basic information about the current waze version installed in your cell-phone.

 Send Logs
In order to send logs, you need to press the ![]() button.
However sending logs requires a large amount of data. Before sending the logs, your cell phone will ask for your permission to do it.
button.
However sending logs requires a large amount of data. Before sending the logs, your cell phone will ask for your permission to do it.

 About
About
Here you can get basic information about the current waze version installed in your cell-phone. This information will appear in the following message.

Scoreboard
Selecting on ![]() button, you will able to see on an external screen your scoreboard and rank position on Waze.
button, you will able to see on an external screen your scoreboard and rank position on Waze.

Groups
Selecting on ![]() button, you will able to see the following external screen:
button, you will able to see the following external screen:

The Windows Mobile devices do not support the groups interface yet. The groups interface can be accessed via the Dashboard on the Waze website.
Report
Clicking on ![]() button, you will be able to see the following menu:
button, you will be able to see the following menu:

Note: This screen and all the options inside of it appear only, if there is GPS reception and an Internet connection.
Here, you can choose report one of the following events:
 Police
In order to report a Police event, you need to press the “Police” button. Then, the next screen will appear.

There you will be able to describe the event, to decide in which direction occurred the event and if you want to add a photo of the event.
 Traffic
In order to report a Traffic jam event, you need to press the “Traffic” button. Then, the next screen will appear.

There you will be able to describe the event, to decide in which direction occurred the event and if you want to add a photo of the event.
 Accident
In order to report a Accident event, you need to press the “Accident” button. Then, the next screen will appear.

There you will be able to describe the event, to decide in which direction occurred the event and if you want to add a photo of the event.
 Hazard
In order to report a Hazard event, you need to press the “Hazard” button. Then, the next screen will appear.

There you will be able to describe the event, to decide in which direction occurred the event and if you want to add a photo of the event.
 Speed cam
In order to report a Speed cam, you need to press the “Speed cam” button. Then, the following message will appear.

There you need to decide in which direction the speed cam is positioned.
 Chit Chats
In order to create a Chit Chat conversation, you need to press the “Chit Chat” button. Then, the next screen will appear.

There you will be able to describe the event, to decide in which direction occurred the event and if you want to add a photo of the event.
 Update Map
In order to report a Map updated event, you need to press the “Map updated” button. Then, the next screen will appear.

In this menu you will be able to decide to record new roads, update house numbers or report map problems.
 Record new roads
If you choose to record new roads, The new road recorder will start to work automatically.
To stop recording just click on the tractor icon ![]() or go again to Report>>Map updated>>Record new roads.
or go again to Report>>Map updated>>Record new roads.
 Updated house numbers
Here you can updated house numbers in your current position.
 Report map problem
Here you will be able to report the map problem and give a first description of it.
Check in with Foursquare
Clicking on  you will get access to the next window:

In this screen you can logged in to Foursquare and to set up different settings.
Search
Clicking on ![]() button, you will be able to see the following menu:
button, you will be able to see the following menu:

On the top of the screen you need to write the address or the place that you are searching for. Also in this screen you can go to your favorite places, recent searches, saved locations or your contacts list.
 My Favorites
Here you can keep a destination point as one of your Favorite destinations. Also, here you can set this favorites as a destination point, show them on the map and more.

 Recent searches
Here you can check your more recent searches. Also here, you can set your recent searches as a destination points, show them on the map, add to favorites and more.

 Saved Locations
Here you can save your current location or any other location in the map. Also here, you can set your saved locations as a destination points, show them on the map add favorites and more.

In order to save a location, you need to press for a few moments on one point on the map. Then, it will appear the following message. In order to save the location please press the save location button.

After pressing the save location button, it will appear the following screen:

Press ![]() , in order to save the location.
, in order to save the location.
 Contacts
In this screen you can check up your cell phone contacts.

 Current Position
In order to know your current position on the map you need to press the position button ![]() .
.
NOTE: If your cell phone do not receive any GPS signal, Waze will not be able to determinate your current position on the map.
BlackBerry
Download Waze
Go to m.waze.com using the phone's internal browser


Run Waze

Getting Started
Accept Waze's Terms of Use

Waze's terms of use will appear on the screen. In order to proceed you need to confirm that you understand and accept those terms of use.Click the Accept button to continue to use waze, or the Decline button to exit the program.If you have accepted the terms of use, you will next get a form to create your account.
Select the preferred language.

Registration screen
New user
Select the Sign up option.

Type in your details below in order to create your account:
You are asked to provide a username and password, an email address, and optionally to choose a waze nickname, which is used to identify you on the map and in reports you send, should you choose to be identified.

- Enter the username you'd like. The username is case sensitive so Jenny is not the same as jenny.
- After you have proceeded to fill in all of the form, waze will display the filled-in form (your password will be displayed as five stars no matter how long it actually is).
- If the information is the way you want it, select Create in order to create your account. If not, select the line you want to change.

After filling all the fields click on the next button.
Twitter connect
You can also enter your twitter account details. Your routes and / or road reports will be tweeted automatically from your account according to your settings. (Add internal wiki link to the Settings -> Profile -> Twitter)

Congratulation you have a new WAZE account.

Once you have an account that you've previously logged in to, starting waze will bring you directly to the main screen. To save battery consumption, it's a good idea to close waze when you leave your car and to minimize it or shut off the display whenever you don't need it.
Existing User
If you already have a waze account select the Sign in option.
Enter your User name and password and click on Log In.

BlackBerry Menu button
First Box
Back to BlackBerry Menu button
Me on map:

Displays your current location on the map, with an icon representing your car.
(you can change the icon for your car via the BlackBerry Menu Button > Profile > Car) (Add internal link). This is the default state of waze's main screen provided if you have GPS connectivity in your current location (green or orange GPS icon on the status bar)(Add status bar chapter)(Add internal link).
Whenever the car icon isn't displayed, just press "Me on Map" to update the map to your current location. If you don't have a good enough GPS connection (grey GPS icon with an X on it), the "me on map" option won't be available, because if you don't have a GPS connection, waze can't determine your approximate location.
Report:

This is where you report an event. One click on the Report button displays a menu of several different types of events: reporting can be as simple as choosing the type of event and pressing Send. The event will be marked at the location you were in when you clicked on “report”.
Other users will see it pinned on the map with its icon
The types are:
- Police - Appears on the map and also announced in the navigation guidance if reported on your driving direction of the road.
- Traffic – Appears on the map. Not announced in the navigation guidance
- Accident - Appears on the map. Not announced in the navigation guidance
- Hazard - Appears on the map. Not announced in the navigation guidance
- Chit Chat - Appears on the map. Not announced in the navigation guidance
- Speed cam – Can't be reported through BlackBerry for the moment. Appears on the map and also announced in the navigation guidance if reported on your driving direction of the road.
- Check in with Foursquare – Allows to check in to a foursquare location nearby. See the profile section (Add link to profile section) for more details.

After choosing a type of event you get a screen where you need to indicate whether it's on your side of the road (default) or the other side. Click once to select :

A text description of the event - optional (disabled while car is moving).

View Real time alerts

Simply by driving around with waze running on their smartphones, drivers share real-time information that waze translates into road and traffic conditions. These are called "events". This information about events is collected and analyzed in real time to provide all wazers with the optimal route to their destination at any given moment.
This menu organized by type of event, of the real-time live reports by wazers about problems in your area:
- All - gives you a list of all events reported in your area, listed by distance
- Police - displays only reports of police cars/traps , listed by distance
- Traffic - displays only reports of traffic loads in your area (light / moderate / heavy / standstill) listed by distance
- Accidents - displays only reports of accidents in your area.
- Chit Chats – display the conversations of wazers around you.
- Other - any reports of events that aren't in one of the above 3 categories.

Not supported...
Second Box
Back to BlackBerry Menu button
New address

You may enter the name of a road, an address, a place name or keywords. Waze will show you a list of matches ordered by proximity and importance of the place. If there are few matches, a Google Local Search will be used. So you can search for "toy shop" or "gas station" and Waze will let you select from the closest matches. You don’t have to enter a city but if your destination is not in your current city, you might want to enter a city as well. If Waze does not know the house numbers on your destination road, or you don't enter a house number, Waze will choose the middle of the road.

While viewing the list of matching addresses, tap the BlackBerry Menu Button. A small menu will open:


Select one of the folowing:
Drive
Select in order to choose your destination. The same as selecting the name of the saved location
Show on map
Centers the map display on the location
Add to favorites
You have the choice of entering a name for the favorite. If you select Done this location will be added to the end of your My favorites list.
After selecting the Drive option, Waze will suggest you an optimal route to your destination, considering different factors like Traffic jams and hazards.
If you want, you can choose an alternative route by tapping the Alternatives option. You will get all the alternative routes to your destination and you can select your desirable one.

Local Search

If you choose the destination from the result of a Google Local Search, Waze will use the exact location of the destination, as provided by Google.
My Favorites

This is a list of saved locations that you chose to add to favorites. You can select any location here as your destination. This list is sorted based on how recently and frequently you selected the favorite as a destination.
Recent Searches

A list of recent locations you selected after using search address or place or selecting a destination using the location menu. The most recent search is at the top. Note: Destinations chosen from my favorites or saved locations are not included in the Recent Searches list.
Saved Locations

A list of locations saved using the location Menu. You can select any location here as your destination. The most recently saved location is at the top of the list of Saved locations.
Third Box
Back to BlackBerry Menu button
General

The settings allow you to view and personalize your waze experience. Tap it to enter the General Settings menu.

- Language - allow you to change the language of the system.
- Prompts - allows you to change the language of the navigation instructions.
- Measurement system – you can choose to display distances in miles or in kilometers.
- Auto zoom - by default it's "on", so the map will zoom in and out while you're navigating, based on the distance to your next decision point (e.g. place where you have to turn). You can disable this feature by selecting "off".
- Navigation Guidance - whether you want voice instructions in addition to the map display when following a route .
- Show points ticker - Whether to display the points ticker
- 24 hour clock – allows you to choose between 24/12 hour clock.
Auto learn routs to your frequent destination -
Map Settings

This menu allows you to set the display of the map.

Map color scheme – allows you to change the colors of the map.
Speedometer – shows your driving speed.
Wazers – shows other wazers on the map.
Traffic layer (color coded) – show traffic condition on the roads near your location (Yellow – light traffic, Orange – intermediate traffic, Red – heavy traffic, Black – bumper to bumper traffic).
Speed cams – show the speed cams on the map.
Road goodies – show road goodies on the map.
Chit chats – show all the chit chats.
Police traps – show police traps on the map.
Accidents – show accidents on the map.
Traffic jams – show traffic jams on the map.
Hazards – show road hazards on the map.
Profile

Displays your account details: username, five stars representing your password (no matter how long your password is) and nickname; and lets you change your nickname. To change your username and password, first go to the waze.com site, log in, and make the changes, and only then update it on your phone.

Car - Displays a car icon which will represent your car on the map you see. You can choose from a large number of cars of different types and colors (more cars coming soon!!)

Privacy - This menu displays a screen headed "Display my location on mobile and web" with the options "when driving" and "when reporting". Waze always respects your privacy, and your location will never be shared against your will. This is where you define the degree of privacy you'd like:
When driving :

Nickname and avatar:
- other wazers will see your location on the map, and your avatar will display your current mood (as described regarding the Status bar avatar, above). If you've chosen this option, your status bar displays a green avatar.
Anonymous:
- your location is shown but not your identity (neither username nor nickname): you appear as an "anonymous user". This is the default. The top Status bar shows this by displaying your avatar :in blue with a question mark on it.
Don't show me:
- your location won't be shown at all – you're there but invisible, like a ghost! The top Status :bar shows this displaying a ghost avatar.
When reporting:

Using my nickname:
- your reports are identified by your nickname
Anonymous:
- your reports are sent anonymously, no information identifying their sender is displayed
Mood - Displays the icon for your current mood – you can change it to one of the others. Twitter - lets you choose whether to tweet your waze reports to your twitter followers; if you choose to do so, enter your Twitter username and password. Your current mood will be included in the tweet. You can disable and re-enable tweeting at any time without affecting your Twitter credentials.
Foursquare - lets you set up your foursquare account to use with waze, and set tweets about your foursquare activity.
Routing

Here you tell waze how to calculate the optimal route for you.

Route preference – you prefer the calculation to choose either the shortest route, or the fastest taking into account current event reports along that route. The default is "fastest".
Dirt roads – you can choose to allow their inclusion in your route, to forbid it, or to allow short ones but avoid long ones where possible.
Minimize turns - if this is "on", waze calculates a route that will require you to turn from one street into another as few times as possible.
Avoid highways – the default is "off". If you prefer to spend as little time on highways as possible, choose "on". (It isn't always possible, of course, to avoid highways altogether, but waze will do its best, taking into account your other routing preferences).
Avoid toll roads - the default is “off”. If you prefer not to enter toll roads choose “on”.
Data usage

This menu allow you to control the amount of data that you receive.

Download traffic info - the default is “on”. Allows you to reduce the amount of data that you receive. Stop the downloading of the traffic info.
Fourth box
Back to BlackBerry Menu button
Scoreboard


Groups

View my points

Allows you to see your points, rank and new points that you accumulated.

Send error logs
ADD SCREENSHOT
Allows you to send log files – you can send log files to Waze every time you encounter a problem with the app. The files are sent to the development team, analyzed and all the changes are applied in the next version of Waze. You basically help us improve the application.

Shortcuts

Allows you to see all the shortcuts of the app.
About
Shows you the Waze version and the license.

Exit
Turn off the application completely.
Me on map

Displays the map of your current location, with an icon representing your car.
Report

This is where you report an event. Tapping the Report button displays a menu of several different types of events: reporting can be as simple as choosing the type of event and pressing Send. The event will be marked at the location you were in when you chose the type of event.


Drive to

You may enter the name of a road, an address, a place name or keywords. Waze will show you a list of matches ordered by proximity and importance of the place. If there are few matches, a Google Local Search will be used. So you can search for "toy shop" or "gas station" and Waze will let you select from the closest matches. You don’t have to enter a city but if your destination is not in your current city, you might want to enter a city as well. If Waze does not know the house numbers on your destination road, or you don't enter a house number, Waze will choose the middle of the road.
My favorites

You can select any location here as your destination. This list is sorted based on how recently and frequently you selected the favorite as a destination.
Manual de uso para Windows Mobile
Instalación
Primero que todo, es necesario que te asegures que tu equipo esté conectado a la red (ya sea por 3G o WI-FI). Para descargar Waze, es necesario que entres a la siguiente página: http://m.waze.com De inmediato te aparecerá el siguiente mensaje:
|
|
|
|---|
Por favor acepta el programa. Después tendrás que escoger cuál seráá la ubicación en la cual quieres instalar Waze. Para optimizar el rendimiento del software, te recomendamos que instales el software directamente a tu dispositivo móvil y no en la tarjeta de memoria.
Tu primera vez?
Después de haber instalado Waze en tu W.M., pulsa en el ícono de Waze para abrir la aplicación. Si es la primera vez que utilizas Waze en tu W.M., recibirás los siguientes mensajes:
Estos mensajes te indicarán que tu aparato está buscando señales de GPS.
|
|
|
|---|
Seleccione el servidor:
Si tu Windows Mobile y Waze no logran reconocer tu posición actual, Waze te pedirá que selecciones en que servidor te encuentras:
-USA & Canadá.
-Israel.
-Internacional (Resto del mundo).
Selección de Idioma:
Después de haber seleccionado en qué servidor te encuentras, tendrás que escoger el idioma en el que deseas utilizar Waze.
Por favor, escoge en qué idioma deseas utilizar Waze, para continuar con la instalación.
|
|
|
|---|
Términos de uso:(TBD)
Por último, como nuevo usuario recibirás un mensaje de bienvenida y una solicitud para aceptar las condiciones de uso de Waze.
Haz click en el botón de aceptar para continuar utilizando Waze, o el botón de rechazar para salir del programa. Si has aceptado los términos de uso, lo próximo será un formulario para crear tu cuenta.
Crear tu Cuenta:
Primero tienes que decidir si quieres iniciar la aplicación con una cuenta nueva o iniciar con una cuenta existente:
Creando un nuevo usuario:
Si has decidido crear una nueva cuenta, tendrás que contestar el siguiente formulario. Aquí tendrás que proporcionar los siguientes datos: Nombre de usuario, Contraseña, una dirección de correo electrónico válida y un apodo de usuario en Waze (opciónal).
Nota I: El apodo sirve para identificarte en el mapa y en los informes que envíes (podrás definir hasta qué nivel quieres ser identificado en tu perfil -mira la sección de Configuración).
Nota II: Si deseas recibir actualizaciones y noticias relacionadas a Waze, haz click en la ventanilla de “Enviarme actualizaciones”.
Dentro de este formulario, existe también la opción de “Saltar”. Si decides saltarte y no crear una cuenta formal en waze, recibirás un usuario temporal con el cual podrás navegar. Sin embargo, no podrás acumular puntos ni subir de nivel dentro del sistema.
Si decidiste usar la opción de “saltar”, verás el siguiente mensaje:
Nota III: Podrás crear una cuenta ya estándo dentro del la aplicación. Para esto será necesario que vayas a Menú>>Configuración>>Perfil. Esta será la pantalla que encontrarás si estas usando Waze con un usuario temporal.
Pantalla Principal:
Esta es la pantalla principal de la aplicación.

La pantalla principal de Waze tiene las siguientes secciones:
-Barra superior.
-Centro de la pantalla.
-Barra inferior.
La Barra superior:
En la barra superior de la pantalla encontrarás 6 diferentes íconos. Cada uno de ellos te dará información básica acerca de la aplicación, tu ruta de viaje y tu estado actual.
![]()
GPS:
| Recepción alta. | |
| Recepción baja. | |
| Sin recepción. |
Internet connection:
| Conectado. | |
| Sin concesión |
Estado de ánimo:
| El ícono de estado de ánimo representa el ánimo tuyo mostrado a los demás wazers en el mapa. Si pulsas en el ícono de estado e ánimo, Waze te mostrará el siguiente menú. |
Grupos:
| Dentro del ícono de Grupos podrás encontrar todos los reportes y alertas enviados por los miembros de grupos de los cuales formas parte. |
Eventos
| Información en vivo: aquí podrás ver los informes en directo de eventos en tu zona o ciudad, en tu camino o que hayan sido reportados por alguien de tu grupo. |
Salida
| Desde este menú podrás decidir si salir de la aplicación totalmente o salir de ella y que reanude después de 30 segundos o que tú la reanudes de forma manual. |
Centro de la pantalla:
El centro de la pantalla principal muestra de forma predeterminada el mapa de la zona con tu ubicación actual. Puedes cambiar la visualización del mapa de varias maneras:
1.- Zoom: Toca la pantalla (un toque corto)para abrir el menú lateral. En este menú, podrás cambiar la visualización del mapa a través de los botónes de zoom in ![]() y de zoom out
y de zoom out ![]() .
Dentro del menú lateral también verás una pavimentadora amarilla.
.
Dentro del menú lateral también verás una pavimentadora amarilla.  . Si pulsas este ícono podrás pavimentar nuevas calles que no existen en el mapa. Para dejar de pavimentar sólo tienes que volver a pulsar en el ícono del tractor.
2.- Arrastrar: También puedes arrastrar el mapa con tu dedo para colocarlo en la posición que deseas visualizarlo.
3.- 3D\2D: Es posible determinar la vista del mapa al modo de 3D o al modo de 2D.
| 3D modo | 2D modo |
|---|---|

|

|
Para hacer esto hay que hacer lo siguiente: MÁS>>>CONFIGURACIÓN>>>VISTA
Crear ruta de viaje entre dos puntos en mapa:
Es posible crear una ruta de viaje entre dos puntos diferentes en el mapa. Lo que uno tiene que hacer es hacer un toque largo en uno de los puntos deseados en el mapa. A través del toque largo te aparecerá en la pantalla el siguiente mensaje:

Dentro de ese menú puedes escoger si deseas que el punto sea de partida o de destino. Repite la misma secuencia para escoger el segundo punto y así crear tu ruta de viaje.

Barra Inferior:
En la barra inferior de Waze encontrarás cuatro botónes que te darán acceso a todas las funciónes de Waze.
![]()
1.-Más.
2.-Reportar.
3.-Navegar.
4.-Mi ubicación.
Más:
Si pulsas en el botón de “Más” ![]() , aparecerá de inmediato el siguiente menú:
, aparecerá de inmediato el siguiente menú:

En este menú podrás configurar la aplicación, revisar cuál es tu actual posición en la tabla de posiciónes de Waze o ver cuáles fueron las actividades más recientes dentro de tus Grupos.
Configuración
![]()
Pulsando en el botón de “Configuración”, verás la siguiente pantalla:

Esta es la pantalla de “Configuración”, de aquí podrás cambiar y configurar a tu gusto todas las opciónes en Waze. La pantalla está dividida en dos partes:
1.-Acciones Rápidas.
2.-Menus Generales.
Acciones rápidas:
Dentro de “Acciones rápidas” están las siguientes opciónes:
Comandos de voz: Aquí podrás activar o desactivar los comandos de voz.
![]()
Vista: Aquí podrás cambiar la vista del mapa a 3D o a 2D.
![]()
Modo: Aquí podrás cambiar el modo de visualización del mapa entre Día y Noche.
![]()
Opciónes Generales

Dentro de “opciónes Generales” encontrarás el siguiente menú:

-Idioma (menú):
![]()
Aquí podrás elegir entre los idiomas disponibles en el menú.

-Idioma (audio):
![]()
Aquí podrás elegir entre los idiomas disponibles para la navegación.

-Unidad de distancia:
![]()
Aquí podrás elegir en qué unidad de distancia deseas trabajar.
-Zoom Automático:
![]()
Aquí podrás activar o desactivar el zoom automático durante la navegación.
-Mostrar Puntaje:
![]()
Aquí podrás elegir si deseas visualizar tu puntaje y rango dentro de Waze.
-Utilizar teclado normal
![]()
Aquí podrás elegir si deseas trabajar con el teclado de waze o con el teclado normal de tu aparato.
-Reloj 24 Hrs:
![]()
Aquí podrás elegir si deseas visualizar la hora en la pantalla principal.
-Memorizar automáticamente mis rutas frecuentes:
![]()
Aquí podrás activar o desactivar la función de memorizar automáticamente tus rutas más frecuentes.
-Radio del evento:
Pulsando en el botón “Radio del evento”, te mostrará el siguiente menú:

Aquí podrás elegir dentro que radio deseas recibir eventos relevantes a tu navegación.
Perfil:

Dentro de “Perfil” encontrarás el siguiente menú:

Aquí podrás conectarte, cambiar y configurar tu cuenta en Waze, FaceBook, Twitter y Foursquare. Aquí también podrás ajustar tus configuraciones de privacidad dentro de Waze.
-Vehículo:
![]()
Dentro de “Vehículo” encontrarás el siguiente menú:

Aquí podrás seleccionar el ícono de tu vehículo. Este ícono mostrará tu posición actual en el mapa.
-Ajustes de privacidad:
![]()
Pulsando en el botón “Ajustes de privacidad” verás el siguiente menú:

Aquí podrás decidir cómo quieres que Waze te muestre en el mapa (ya sea por tu apodo o de forma anónima).
-Recibir Ping:
![]()
Aquí podrás activar o desactivar la función de recibir y enviar Pings.
-Twitter:
![]()
Pulsando en el ícono de “Twitter” verás la siguiente pantalla:

En esta pantalla podrás acceder a y configurar las diferentes opciónes dentro de Twitter.
-Facebook:
![]()
Pulsando en el ícono de “Facebook” verás la siguiente pantalla:

En esta pantalla podrás acceder y configurar las diferentes opciónes dentro de Facebook.
Para conectarte, por favor pulsa en el símbolo de Facebook. Este símbolo te llevará a una panatalla externa en la cual te podrás conectar.

-Foursquare:
![]()
Pulsando en el ícono de “Foursquare” verás la siguiente pantalla:

En esta pantalla podrás acceder y configurar las diferentes opciónes dentro de Foursquare.
Mapa:

Dentro de “Mapa” encontrarás el siguiente menú:

Aquí podrás configurar los ajustes generales del mapa.
-Color del mapa:
![]()
Pulsando en el botón “Color del mapa” verás el siguiente menú:

Aquí podrás elegir el color con el cual visualizarás tu rutas y mapas.
Ajustes de Ruta:

Dentro de “Ajustes de Ruta” encontrarás el siguiente menú:

Aquí podrás ajustar tus preferencias sobre el tipo de víasvías que deseas utilizar durante tu navegación con Waze.
-Preferencias de ruta:

Dentro de “Preferencias de Ruta” encontrarás el siguiente menú:

Aquí podrás elegir entre las siguientes opciónes: la ruta más rápida o la ruta más corta).
-Vías de tierra:
![]()
Dentro de “Vías de Tierra” encontraras el siguiente menú:

Aquí podrás elegir entre usar o no vías de tierra.
Uso de Datos:

Dentro de “Uso de Datos” encontrarás el siguiente menú:

Aquí podrás configurar los ajustes generales en el uso de datos.
Grupos:

Dentro de “Grupos” encontrarás el siguiente menú:

Aquí podrás ajustar tu configuración preferida en el tema de Grupos dentro de Waze.
-Pop-up de reportes:

Dentro de “Pop-up” encontrarás el siguiente menú:

Aquí podrás elegir entre las siguientes opciónes.
-Waze group icons

Dentro de “íconos de Grupos de Wazers” encontrarás el siguiente menú:

Aquí podrás elegir entre las siguientes opciónes.
Detectar senal de GPS:

Si tu dispositivo no está recibiendo señal GPS, por favor pulsa en el botón “Detectar señal GPS”. Sin embargo, si tu dispositivo ya se encuentra conectado,el siguiente mensaje te aparecerá:

Ayuda\Acerca de...:

Dentro de “Ayuda/Acerca de” encontrarás el siguiente menú de ayuda:

Aquí podrás recibir ayuda e información elemental sobre el funcionamiento de Waze y también desde aquí podrás enviar tus archivos Log.
-Enviar Logs:
![]()
Para enviar tus archivos LOG, pulsa en este botón. Sin embargo, tienes que saber que enviar archivos LOG consume una gran cantidad de datos. Siempre, antes de enviar tus archivos LOG Waze te pedirá tu autorización.

-Acerca de...:

Aquí recibirás información básica sobre la versión que está instalada en tu dispositivo. Esta información aparecerá en el siguiente mensaje.

Posiciones:
![]()
Pulsando en el ícono “Posiciones” verás la siguiente pantalla:

Aquí podrás revisar tus puntos acumulados y tu rango dentro de Waze. También podrás revisar la tabla general y los cambios sucedidos últimamente (la tabla general y tu tabla personal se actualizan diariamente).
Grupos:
![]()
Pulsando en el ícono de “Grupos” verás la siguiente pantalla:
Los dispositivos con Windows Mobile no cuentan con la posibilidad de usar la interfase de “Grupos”. Sin embargo, sí les será posible utilizar la interfase a través de la página web de Waze.
Reportar: (tbd)
![]()
Aquí podrás reportar eventos a toda la comunidad y a tus grupos. Seleccionando el botón de “Reportar”, visualizaráás el siguiente menú:
SCREEN SHOT & SCREEN SHOT
Reportar es tan fácil como elegir el tipo de evento y pulsar “enviar”. El evento será marcado automáticamente en la ubicación que te encontrabas en el momento de reportar el evento.
Nota: Esta pantalla y todas las opciónes dentro de ella aparecerán sólo si tu aparato está conectado correctamente al a la red y si recibe señal GPS.
Los tipos de evento que puedes reportar son:
1.Policía.
2.Tráfico.
3.Accidente.
4.Peligro.
5.Radar de velocidad.
6.Chit-Chat.
7.Actualizar mapa.
8.Check in con FourSquare.
Policía:
![]() Pulsando en el ícono de “Policía” verás la siguiente pantalla:
Pulsando en el ícono de “Policía” verás la siguiente pantalla:
SCREEN SHOT
En esta pantalla podrás indicar de qué lado de la vía ha ocurrido el evento, dar una descripción corta sobre el evento y agregar una fotografía del mismo.
Tráfico:
![]() Pulsando en el ícono de “Tráfico” verás la siguiente pantalla:
Pulsando en el ícono de “Tráfico” verás la siguiente pantalla:
SCREEN SHOT
En esta pantalla podrás indicar de qué lado de la vía ha ocurrido el evento, dar una descripción corta sobre el evento y agregar una fotografía del mismo.
Accidentes:
![]() Pulsando en el ícono de “Accidente”, verás la siguiente pantalla:
Pulsando en el ícono de “Accidente”, verás la siguiente pantalla:
SCREEN SHOT
En esta pantalla podrás indicar de qué lado de la vía ha ocurrido el evento, dar una descripción corta sobre el evento y agregar una fotografía del mismo.
Peligros:
![]() Pulsando en el ícono de “Peligro”, verás la siguiente pantalla:
Pulsando en el ícono de “Peligro”, verás la siguiente pantalla:
SCREEN SHOT
En esta pantalla podrás indicar de qué lado de la vía ha ocurrido el evento, dar una descripción corta sobre el evento y agregar una fotografía del mismo.
Radar de velocidad:
![]() Pulsando el ícono de “Radar de velocidad”, podrás colocar alertas sobre cámaras\radares de velocidad en tu vía.
Pulsando el ícono de “Radar de velocidad”, podrás colocar alertas sobre cámaras\radares de velocidad en tu vía.
SCREEN SHOT
Aquí tendrás que poner en qué dirección se encuentra posicionada la cámara de velocidad.
Chit Chat:
![]() Pulsando en el ícono de “Chit-Chat” verás la siguiente pantalla:
Pulsando en el ícono de “Chit-Chat” verás la siguiente pantalla:
SCREEN SHOT
En esta pantalla podrás indicar de qué lado de la vía ha ocurrido el evento, dar una descripción corta sobre el evento y agregar una fotografía del mismo.
Actualizar Mapa:
![]() Pulsando en el ícono de “Actualizar Mapa” verás la siguiente pantalla:
Pulsando en el ícono de “Actualizar Mapa” verás la siguiente pantalla:
SCREEN SHOT
Aquí podrás registrar nuevas vías, actualizar detalles (como número de casa) y reportar problemas en el mapa.