(21 tussenliggende versies door 2 gebruikers niet weergegeven)
Regel 1:
Regel 1:
{{TopLine}}
{{TopLine}}
[[Category:Editing aspects]]
<languages />
<languages />
==Lane Guidance==
==Lane Guidance==
Regel 5:
Regel 6:
<div class="mw-translate-fuzzy">
<div class="mw-translate-fuzzy">
=== General ===
=== General ===
<i>Lane Guidance</i> (LG) now works at intersections with a [[File:LG-plus-sign.png|11px]], H, T and [[File:LG-hash-sign.png|15px]] structure. [[Roundabout|Roundabouts]], more complex intersections and [[Junction Box|JBs]] are not (fully) supported yet. For <i>road width</i> info visit the [[Road width]] page.<br>
<i>Lane Guidance</i> (LG) now works at intersections with a [[File:LG-plus-sign.png|11px]], H, T and [[File:LG-hash-sign.png|15px]] structure.<br>
For lanes over [[Roundabout|Roundabouts]] (MULRA) see the [[Multiple Lanes for RoundAbouts]] page.<br>
For an explanation of the lane width, see the [[Road width]] page.<br>
<br>
<br>
The distance to the intersection where <b>LG</b> is displayed depends on the [[Road types|road type]]:<br>
The distance to the intersection where <b>LG</b> is displayed depends on the [[Road types|road type]]:<br>
Regel 18:
Regel 21:
[[File:LG-NL-001.png|right|270px]]
[[File:LG-NL-001.png|right|270px]]
<div class="mw-translate-fuzzy">
[[File:LG-NL-002.png|right|270px]]
[[File:LG-NL-002.png|right|270px]]
* You will only see arrows for your direction of travel when there is also an instruction. Without [[Junction_Arrows#Turn_Instruction_Overrides|turn instruction]] in the [[Waze app|app]] so no arrows displayed.
* You will only see arrows for your direction of travel when there is also an instruction. Without [[Junction_Arrows#Turn_Instruction_Overrides|turn instruction]] in the [[Waze app|app]] so no arrows displayed.
* We follow as much as possible the arrows on the signs and on the road surface.
* We follow as much as possible the arrows on the signs and on the road surface.
* The arrows that the app chooses by default can be overruled, which is sometimes necessary with complex intersections. But also then keep the arrows on signs or road as a correction.
* When the arrows on the road surface deviate from the arrows on the signs, we follow the signs. Please note: Arrows on the road may be covered by snow or other road users due to traffic jams.
* The arrows that the app chooses by default can be overruled, which is sometimes necessary with complex intersections. But also follow the arrows on the signs or on the road. (If it is ultimately a right-angle turn then a 90 degree arrow; if it is a deflecting turn then a slanted arrow.)
* Once there are multiple lanes to choose from to go in a direction, enter <b>LG</b>.
* Once there are multiple lanes to choose from to go in a direction, enter <b>LG</b>.
* If there are no separate lanes, no signs, no arrows, do not enter <b>LG</b>.
* If there are no separate lanes, no signs, no arrows, do not enter <b>LG</b>. Also not for [[Ramp|exits]] on [[Major Highway|MH]] or [[Minor Highway|mH]].
* If there are two lanes that turn the same way, you can enter them.
* If there are multiple lanes that turn in the same direction, you can enter them.
* If arrows have not been applied to the road surface or signs in all directions, this will have to be done in [[Waze Map Editor|WME]]. Lanes cannot be left empty.
* If arrows have not been applied to the road surface or signs in all directions, this will have to be done in [[Waze Map Editor|WME]]. Lanes cannot be left empty.
* Lanes that 'normal' traffic cannot use, such as public transport, are not yet supported and can therefore not be indicated yet, unless the intersection has already been adapted for this.
* Lanes that 'normal' traffic cannot use, such as [[Pedestrian_Boardwalk#Public_transport|public transport]], are not yet supported and can therefore not be indicated yet, unless the intersection has already been adapted for this.
* For the application of <i>Lane guidance</i> for rush-hour lanes, if the rush-hour lane is on the left, we include that rush-hour lane in the number of lanes, and if the rush-hour lane is on the right (usually the emergency lane) it becomes not included in the lane indication.
* A rush hour lane is only included in the number of lanes in <b>LG</b> if both of the following conditions are met:
**An instruction has been set to go straight to stay on the highway;
** The rush hour lane is on the left.
* We are not going to make any intersection adjustments for the time being to make the <b>LG</b> work.
* We are not going to make any intersection adjustments for the time being to make the <b>LG</b> work.
<br>
<br>
Wrong save results in no display in the app and a gray area in the [[Waze Map Editor|WME]].
* Saving incorrectly set <b>LG</b> will result in no display in the app for all lanes of the segment in question. In WME you will see an exclamation mark at the junction node, and if you open the <b>LG</b> menu, an exclamation mark at the lane where it is incorrect.<br>
Currently it is quite common that saved <b>LG</b> is not displayed afterwards. This could possibly be another bug in [[Waze Map Editor|WME]]. You may also see the color turn gray if you slide the card away without saving the change immediately. <br>
* [[File:LG-NL-003.png|right|270px]] In [[Waze Map Editor|WME]] you will also see exclamation marks in the lanes if the node you got the <b>LG</b> from looks (far) out of the picture. These will appear again when the node comes into view again.
</div>
* Not all arrows as they appear on the road in the Netherlands are available in the <b>LG</b> menu. Choose the most suitable one.
* The [[WME LaneTools Dev]] script makes setting the <b>LG</b> a bit easier, so the map immediately shows that <b>LG</b> has been set.
===Corners===
The angles between the segments affect <b>LG</b>. WME automatically chooses the shape of the arrow of the <b>LG</b> based on the angle between segments:
*For a right-angle arrow, the angle between segments should be between 68 and 112 degrees;
* For a straight arrow, the angle must be between -22 and +22 degrees.
* Everything beyond that becomes a turn arrow or extra sharp turn arrow.
This does not always have to be correct, and there are two ways to correct this. One is not necessarily better than the other, you have to consider what is better per situation.
# Force arrows in the <b>LG</b> menu;
# Adjust the angle between the segments.
If it doesn't matter, force arrows is preferred because of [[KISS]].<br>
<B>Junction with mDL</B><br>
[[File:LG-NL-Kruising-met-mDL.png|350px|right|Junction with mDL]]
You can adjust the angle of the segments by adjusting the geometry of one of the segments. A micro dogleg (mDL) is the most common method. If you use this method, pay close attention to which segment you are adjusting, and what the effect is on any intersection on the other side of that segment.<br>
{{Clear}}
<B>Intersection with forced turns</B><br>[[File:LG-NL-Intersection-with-forced-turns.png|400px|right|Intersection with forced turns]]
You can force the desired arrow by clicking on the arrow in the <b>LG</b> menu and clicking on the correct arrow. You will also see which arrow Waze chooses; it says “(Waze selects)” after it. After you save it, there will be an orange warning: “One or more modified lane indication(s)”. If you click on Change lane instructions you will see which one it concerns, because those arrows are also orange.<br>
[[File:LG-NL-003.png|left|270px]]
{{Clear}}
{{Clear}}
<br>
<B>Comments</B><br>
<br>
* We do not replace <i>heuristics</i> (see below) with forced turns.
* If you hover over an arrow in the <b>LG</b> menu, the exit arrow on the map will be highlighted to clarify which exit it concerns.
<span id="Afritten_en_weefvakken"></span>
=== Exits and filter lanes ===
=== Exits and filter lanes ===
<div class="mw-translate-fuzzy">
We use the following exit instructions and [[Road_Aspects#Filter_lanes|filter lanes]] on all highways and on most [[Major Highway|MH]] and [[Minor Highway|mH]] roads:
We use the following exit instructions and [[Road_Aspects#Filter_lanes|filter lanes]] on all highways and on most [[Major Highway|MH]] and [[Minor Highway|mH]] roads:
</div>
<table>
<table>
<tr><td>Exit:</td>
<tr><td>Exit:</td>
<td>[[File:LG-NL-Arrow-up.png|15px]]</td>
<td>[[File:LG-NL-Arrow-up.png|25px]]</td>
<td>[[File:LG-NL-Arrow-up-right.png|15px]]</td>
<td>[[File:LG-NL-Arrow-up.png|25px]]</td>
<td>[[File:LG-NL-Arrow-up-right.png|25px]]</td>
<td> </td>
<td> </td>
<td> </td>
<td> </td>
<td> </td>
</tr>
</tr>
<tr><td>Filter lane:</td>
<tr><td>Weaving section:</td>
<td>[[File:LG-NL-Arrow-up.png|15px]]</td>
<td>[[File:LG-NL-Arrow-up.png|25px]]</td>
<td>[[File:LG-NL-Arrow-up.png|15px]]</td>
<td>[[File:LG-NL-Arrow-up.png|25px]]</td>
<td>[[File:LG-NL-Arrow-right.png|15px]]</td>
<td>[[File:LG-NL-Arrow-right.png|25px]]</td>
<td> </td>
<td> </td>
<td> </td>
<td> </td>
</tr>
</tr>
<tr><td>Exit with taper:</td>
<tr><td>Exit with taper:</td>
<td>[[File:LG-NL-Arrow-up.png|15px]]</td>
<td>[[File:LG-NL-Arrow-up.png|25px]]</td>
<td>[[File:LG-NL-Arrow-up-right.png|15px]]</td>
<td>[[File:LG-NL-Arrow-up.png|25px]]</td>
<td>[[File:LG-NL-Arrow-right.png|15px]]</td>
<td>[[File:LG-NL-Arrow-up-right.png|25px]]</td>
<td>[[File:LG-NL-Arrow-right.png|25px]]</td>
<td> </td>
<td> </td>
<td> </td>
</tr>
</tr>
<tr><td>Double exit without taper:</td>
<tr><td>Double exit without taper:</td>
<td>[[File:LG-NL-Arrow-up.png|15px]]</td>
<td>[[File:LG-NL-Arrow-up.png|25px]]</td>
<td>[[File:LG-NL-Arrow-up.png|15px]]</td>
<td>[[File:LG-NL-Arrow-up.png|25px]]</td>
<td>[[File:LG-NL-Arrow-right.png|15px]]</td>
<td>[[File:LG-NL-Arrow-right.png|25px]]</td>
<td>[[File:LG-NL-Arrow-right.png|15px]]</td>
<td>[[File:LG-NL-Arrow-right.png|25px]]</td>
<td> </td>
<td> </td>
</tr>
</tr>
</table><br>
</table>
[[File:LG-NL-004.png|600px]]
[[File:LG-NL-004.png|600px]]
<br>
At intersections where a stop line is present, we use that exits are displayed completely as their own lane, so for example:
==Crossings===
<table>
At intersections where there is a stop line, we ensure that exits are displayed entirely as their own lane, as shown below:<br>
<tr><td>Intersection with stop line:</td>
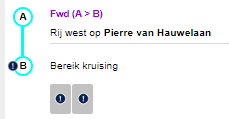
[[File:LG-NL-Kruising-met-stopstreep.png|Crossing with stop line]]
<td>[[File:LG-NL-Arrow-left.png|15px]]</td>
{{Clear}}
<td>[[File:LG-NL-Arrow-up.png|15px]]</td>
<B>The types of intersections we encounter</b><br>
<td>[[File:LG-NL-Arrow-up.png|15px]]</td>
[[File:LG-NL-Types-crossings.png|Different types of crossings|right|500px]]
** 十-intersection: two intersecting two-way traffic segments (normal roads);
</tr></table>
** T-junction: a road split into two one-way traffic or a normal road ends at a normal road;
<br>
* With one or more intermediate segments:
** ⛛-intersection: a T-intersection of divided roads;
** H-intersection: a divided road is crossed by a normal road;
** ⋕-intersection: an intersection of two divided roads.
There are variants, but they can usually be traced back to the five above.
<b>十-intersection and T-intersection</b><br>
For this type of intersection, filling in <b>LG</b> is easiest: you fill in the <b>LG</b> exactly as the road layout is, because there is no intermediate segment. You then proceed as follows:
# Set all turns, especially those that are not allowed;
# Open the <b>LG</b> menu per segment and set <b>LG</b> according to the road layout
## For Number of Lanes, the total number of priority lanes;
## At Exits, the direction for each lane.
Keep the following in mind:<br>
* [[Road width]] is in the same menu, but does not affect <b>LG</b>.
* Make sure that <b>LG</b> is set in the right direction; look at the A or B node.
* Don't forget to click “Save” after the <b>LG</b> is set, otherwise nothing will change.
<b>⛛-intersection, H-intersection and ⋕-intersection</b><br>
[[File:NL-LG-Kruising-X.png|right|500px]] At these intersections there is an intermediate segment, and then <b>LG</b> becomes a bit trickier: for one direction of travel you have to use two segments (1 input segment and 1 intermediate segment) <b>LG</b> are set. The best thing to do when setting up such an intersection is to enter <b>LG</b> direction by direction to keep it as clear as possible for yourself.
{{Clear}}
<b>The conditions that must be met to achieve a working <b>LG</b> at these intersections are</b><br>
[[File:NL-LG-Kruising--.png|right|500px|Crossing roads with separate lanes]]
# Both left and right turns are possible at the intersection;
# The two parts of the shared carriageway (entrance and intermediate segment) are more or less in line with each other (maximum offset of 22°, see also the paragraph on corners);
# The two intersecting roads are more or less perpendicular to each other (maximum offset of 22°);
# The intermediate segment in question is 50 m or shorter;
# The number of lanes entering the intersection is equal to the total number of lanes leaving the intersection (total number of lanes leaving the intersection = number of lanes on the intermediate segment + number of right turn only lanes on the entrance segment - in other words, there no new lanes are added or removed in the intermediate segment).
<b>If this is met, LG can be set as follows:</b>
# Open the <b>LG</b> menu on the input segment;
# Under Number of Lanes, set the total number of priority lanes;
# Under Turns, set the right and straight turns as usual. You can also set the priority lanes for turning left as straight ahead;
# Now open the <b>LG</b> menu on the intermediate segment that is an extension of the entrance segment;
# Under Number of Lanes, set the number of lanes that turn left and go straight;
# Under Turns, set the lanes for left turns and straight ahead;
# Repeat this for each direction of travel.
=== Lanes on shared roads (<b>H</b> and [[File:LG-hash-sign.png|20px]] intersections) ===
[[File:NL-LG-op-ingangsegment.png|left|350px|LG on entrance segment]] [[File:NL-LG-op- Tussensegment.png|right|350px|LG on intermediate segment in line with the entrance segment ]]
{{Clear}}
In the example above, there are a total of four lanes, three of which are for straight ahead or left turns. This results in the app at the junction node of the input segment in the following image: <br>
At intersections where one or both roads are divided, lanes cannot always be added directly.<br>
<br>
Many such intersections can be classified as <b>H</b> intersections (where only one road is divided) or [[File:LG-hash-sign.png|15px]] intersections (where both roads are divided ).<br>
<br>
<i>Please note</i>: On the one-way shared roadway approaching an <b>H</b> intersection, lanes may be added directly to the segments.<br>
<br>
For some [[File:LG-hash-sign.png|15px]] intersections and on the undivided roads approaching some <b>H</b> intersections, Waze can combine lane information from more than one segment into one set of lanes turning both left and right, as the driver expects. This is only possible if all these conditions are met:
#. At the intersection, both left and right turns are possible;
#. The two parts of the shared carriageway are essentially parallel to each other (maximum offset of 21°);
#. The two intersecting roads are more or less perpendicular to each other (maximum offset of 21°);
#. The intermediate segment in question is 50 m or shorter; and
#. The number of lanes entering the intersection is equal to the total number of lanes exiting the intersection (total number of lanes exiting the intersection = number of lanes on the intermediate segment + number of right lanes only on the access segment - in other words, there are no new lanes added in the intermediate segment).
If these conditions are met, follow the instructions in the next section to add lane information.<br>
<br>
<i>Note</i>: The purpose of the [[#Heuristics|heuristics]] is to combine left, straight and right turn arrows into a single lane set. At intersections where turning left or right is not allowed, lanes can be added directly and heuristics are not necessary - in other words, there is no need to add "straight only" lane information. In the example below, right-turning traffic gets the full set of lanes of the entrance segment; adding lanes to the mid-segment makes no sense.
<table>
<b>Comments</b>
<tr><td>[[File:LG-NL-018.png|400px]]</td>
* Turn instructions are set at the location where the turn is made. So turn right on the entrance segment, and left on the intermediate segment. See below for straight ahead instructions.
<td>[[File:LG-NL-019.png|400px]]</td></tr>
* The instructions are linked to the first junction node of the intersection.
</table>
* <b>LG</b> can simply be set at intersections that have a [[Junction Box]] (JB) over them. This can simply be done by <b>L3</b> editors, as long as the segments are locked at that level.
<br>
* At an H intersection, the divided road has no intermediate segment. There, <b>LG</b> can be fully set to the input segment. Depending on the angles, this can also apply to parts of a ⛛ intersection.
* Forced straight arrows on the input segment do not work for heuristics.
* [[File:NL-LG-ingangsegment-linksaf.png|right|400px]] If there is one lane on the entrance segment for turning left (and possibly straight ahead), the intermediate segment will also only have one lane. This is the only exception to the rule that <b>LG</b> is not set for a single lane, otherwise the heuristic will not work.
{{Clear}}
{{Clear}}
===Investigate lanes on divided roads===
===Far Lanes===
Far Lanes (FL) is another way to apply Lane Guidance. This not only allows you to set the <b>LG</b> for a single intersection, it also provides the option to indicate preferred lanes for a subsequent intersection. In principle, it is also no longer necessary to create wybertjes or long parallel segments in order to provide correct instructions; one junction node is now sufficient for this.
There are two options for applying FL:<br>
# FL1 - Through a [[Junction Box]] (JB) - available to <b>L4+</b> editors;
# FL2 - By Path - available for <b>L5+</b> editors.
[[File:NL-LG-FL2-iconen-op-vertreksegmenten.png|right|350px]] If <b>FL1</b> has been applied, it is not immediately visible in WME. You will then need to open the <b>LG</b> menu to see if <b>FL</b> has been set. <b>FL2</b> is recognizable in the map; then there is a light blue dot with a white arrow on the departure segment, provided that the [[Map Layers|map layer]] Paths is active. The <b>LG</b> menu looks the same as <b>FL1</b>.
[[File:LG-NL-020.png|right|400px]]
<b>Comments</b><br>
First, make sure the intersection and exit you are mapping meet the above guidelines.<br>
* In WME, FL is called <i>Far Turns</i>. In this article, <i>Far Lanes</i> / <b>FL</b> is used consistently.
Handle one direction of travel at a time.<br>
* During the rollout, global How To's have been written for FL1 and FL2.
For each direction of travel, lanes must be mapped on two segments: the "entrance segment" (immediately before the intermediate segment) and the "intermediate segment" itself.<br>
* Paths do not yet record speed data, a <b>JB</b> must be used for that.
<br>
* FL1 and FL2 cannot be combined. A segment that is part of a <b>JB</b> cannot be part of a Path and vice versa. If something like this is necessary, the segment must be cut.
In the entrance segment, state the total number of lanes entering the segment.<br>
* FL2 Paths may cross each other.
Any lane that can be used to turn left or go straight should be marked as a continuous straight lane.<br>
* Using <b>FL</b> for one direction of a departure segment breaks the heuristic (if any). <b>FL</b> must then be set for all routes from the departure segment for which heuristics would normally be used.
Right turn lanes should be mapped normally.<br>
* <b>FL</b> cannot be used on connected segments; there must be at least 1 segment in between.
In the intermediate segment, include the total number of lanes on the mid-segment (which should be equal to the number of lanes on the entrance segment minus the number of right-turn lanes).<br>
* The <b>LG</b> arrows for <b>FL</b> must always be selected manually; there is no ''Waze selects'' preference.
<br>
* For both <b>FL1</b> and <b>FL2</b> there is currently a restriction that the <b>JB</b> or the path may not be longer than approximately 1 km.
<table>
* <b>FL</b> is not set to make only the <b>LG</b> arrows correct. It must add something functional.
<br>The [[#Heuristics|heuristics]] in the routing server combines these two sets of lanes together and provides a single set for drivers turning left or right. Unfortunately there is no way to visualize the result in WME.
<b>FL</b> will not be necessary for every intersection with a [[Junction Box]]. A normal ⋕-crossing over which a <b>JB</b> is placed does not need to be adjusted as far as <b>LG</b> is concerned. Only when there are multiple lanes for one direction and lanes in the same direction have different destinations, or if it becomes problematic at the next intersection if you use the wrong lane for that direction, FL is set.
{{Clear}}
{{Clear}}
In the example below, the situation for the direction of travel is indicated with the red arrow as follows:<br>
[[File:NL-LG-FL1-JB-a.png|right|300px]]
# 2 Left lanes turn left from Vondellaan to Plesmanlaan;
# 1 Right lane turn right from Plesmanlaan to Darwinweg.
<table>
If you are in the left lane for turning left, it can be difficult to turn right at the next intersection. That segment is 56 meters, which can result in strange maneuvers if you are not positioned correctly, or a missed turn. This can be due to heavy traffic in the right-hand pre-sorting area, or heavy traffic on Plesmanlaan. It is therefore best to advise that the Wazer uses the right pre-sort box.
<tr>
<td valign=top>The same [[#Heuristics|heuristic]] also applies to the undivided road (two-way) of an <b>H</b> junction. No heuristics are needed for the shared roadway.</td>
There is already a <b>JB</b> at this intersection, because traffic lights for the two intersections are coordinated. The JB then ensures that the speed is registered per route, instead of only on segments (see [[Junction Box|JB wiki page]] for more information about this). So although <b>FL2</b> can be used for the situation itself, the presence of the <b>JB</b> forces us to use <b>FL1</b>.
<td>[[File:LG-NL-023.png|right|500px]]</td></tr>
<tr>
If the departure segment (Vondellaan) is selected, this is the normal image:<br>
<td> </td>
[[File:NL-LG-FL1-JB-b.png|right|500px]] Normal heuristics are set, so every user turning left will be offered both lanes. At most, the “Then turn right” instruction will make someone suspect that it might be useful to use the right-hand sorting box. To improve this, we proceed as follows:
<td>[[File:LG-NL-024.png|right|500px]]</td></tr>
# Remove heuristic, because it is broken by the presence of FL:
<tr>
## Remove the LG on the intermediate segment between Vondellaan and Plesmanlaan;
<td valign=top>Divided roadway (one way)</td>
## On the departure segment (Vondellaan), uncheck the two normal straight arrows under Exits.
<td>[[File:LG-NL-025.png|right|500px]]</td></tr>
# Set FL for the route Vondellaan - Darwinweg:
<tr>
## On the departure segment, check the middle lane at Far Turns;
</table>
## Click in the empty box on the left and select the left arrow.
# Set FL for the route Vondellaan - Plesmanlaan (necessary due to the missing heuristics):
## On the departure segment, check the two left lanes at Far Turns;
## Click in the empty box on the left and select the left arrow.
<b>Comments</b><br>
The short right turn remains set via normal <b>LG</b>, because for <b>FL</b> there must be more than 2 segments in the route. It is therefore not an option at <i>Far Turns</i>.
The instructions are set as normal. If there are specific instructions for the route, set them to the arrow pointing out of the <b>JB</b>.
<i>Note</i>: The intermediate segments of [[File:LG-hash-sign.png|15px]] and <b>H</b> intersections are a rare case where it is sometimes appropriate to " 1 lane" to a segment. This is necessary when there are multiple lanes on the entrance segment, but only one lane is left on the mid segment (because every other lane was only right).
This gives the following result<br>
[[File:NL-LG-FL1-JB-c.png|right|700px]]
{{Clear}}
<table><tr>
'''Another possibility'''<br>
<td>[[File:LG-NL-026.png|right|350px]]</td>
[[File:NL-LG-FL-voorsorteren.png|right|300px]] Another possibility is that pre-sorting must take place earlier for a certain intersection. In the example below, you must already pre-sort at the first traffic light (VRI1) in order to turn left - in particular - at VRI2. Must be, because arrows on the road are a mandatory driving direction. It is therefore not only pleasant, but also necessary to show the correct LG in Waze at VRI1. This cannot be solved with heuristics. In any case, the distance is too great; the segment between VRI1 and VRI2 is 75 m long. Moreover, heuristics are already applied at the intersection at VRI2, and this cannot be done twice in a row.
<td>[[File:LG-NL-027.png|right|350px]]</td>
[[File:NL-LG-FL-voorsorteren-foto.png|right|300px]]So FL must be set. Since the VRIs are also linked together here, FL1 using a JB is the correct solution. In addition, the JB is used to prohibit U-turns at the ⋕ intersection.
</tr></table>
[[File:NL-LG-FL-voorsorteren-b.png|right|425px]] FL is set as follows:
* Select the input segment and open the <b>LG</b> menu;
* Uncheck all the boxes for Turns;
* At <i>Far Turns</i>, set the arrows according to the signs. Because you are showing left turn arrows, you cannot set a See-and-Hear (S&H) instruction;
* Remove the heuristic at the intersection at VRI2 - only for this route, the other heuristics should remain as normal.
* Set the instruction <b>(VI & TTS)</b> on the <b>JB</b> route, but also on the exit of the intermediate segment of the ⋕ intersection itself.
{{Clear}}
=== Checking yourself ===
The user sees this instruction when accessing VRI1. (The lack of <b>VI & TTS</b> is a bug that still needs to be fixed.)
There are a few things you can do to double-check your work at dividing intersections that need to be mapped with heuristics.<br>
* The total number of lanes on the entrance segment must be equal to the total number of lanes at the intersection:
** total lanes (intersection) = total lanes (entrance)
* The total number of lanes on the middle segment must be equal to the difference between the total number of lanes on the entrance segment and the number of right-hand lanes on the entrance segment:
** total lanes (intermediate segment) = total lanes (access) - right-hand lanes only (access)
* The number of straight lanes on the entrance segment (i.e. the number of boxes checked for the straight ahead) must equal the total number of lanes on the median segment:
** straight lanes (entrance) = total lanes (median)
<br>
<br>
If these conditions are not met, the heuristic method may not work as expected and it is best not to enter the lanes for the time being.
[[File:NL-LG-FL-voorsorteren-app.png|left|500px]]
{{Clear}}
=== Junction Boxes ===
Lane information can be added to segments that are part of a [[Junction Box]], just as they can be added to any other segment. All turn arrows in a Junction Box must be green (unlimited) for the lane guidance to work. Use the Junction Box itself to limit any necessary turns.
<br>
<br>
===Paths (Far Lanes 2)===
If there is no [[Junction Box]] at an intersection, and it is not necessary to record speed data for a route, a <i>Path</i> can be used instead of a <b>JB</b> added. Another reason may be that there are too many exits to be allowed to register a <b>JB</b> (>16 currently).
Also for FL2, at least 3 contiguous segments must form a route. There is no maximum number of segments, but with more than 5 intermediate segments, the entire path must be selected instead of just the departure and exit segments.
[[File:NL-LG-FL2-a.png|right|500px]] The reason for setting this <i>Path</i> is the split that during rush hour can lead to traffic already on the departure segment traffic jam represents the direction N206. It may then be difficult to merge into the right lane, so it is better to advise the correct lane during the departure segment. This also applies the other way around; You don't want to be stuck in traffic jams unnecessarily for the better route to the center.
[[File:NL-LG-FL2-b.png|right|500px]] In this case there are 5 segments between the departure and exit segments, so only those 2 need to be selected. A green route and a white icon with a pendulum will then appear, indicating that a path can be set. That icon turns blue when you hover your mouse over it. If you don't see the route and icon, several things could be wrong:
* You are zoomed in too far and/or shifted too far from the departure segment in the map;
* There is a segment in the route in a <b>JB</b>;
* There are more than 5 intermediate segments in the route.
{{Clear}}
[[File:NL-LG-FL2-c.png|right|500px]] It doesn't matter whether you have the [[Waze_Map_Editor#Layers_menu|map layer]] for <i>Paths</i> enabled or not. Once you have saved, you will see the <i>Path</i> on the General tab of the departure segment. This is also the place to delete a <i>Path</i>.
=== Heuristics ===
Setting the <b>LG</b> arrows is again done via the LG menu. Again, follow the arrows on the signs and road.
At intersections with double lanes (one or both intersecting roads), the instruction for the next lane is made up of 2 consecutive instructions. These so-called <i>heuristics</i> ensure that arrows from a next bend in eg <b>H</b> intersections are merged with the first one.
<br>
If you want to show or hear a straight ahead indication at an intersection where heuristics are active, it must be indicated on the first segment, not on the intermediate segment.
<table><tr>
<td>[[File:LG-NL-005.png|270px]]</td>
<td>Voor B: [[File:LG-NL-006.png|160px]]<br>
Na B: [[File:LG-NL-007.png|160px]]</td>
</tr></table>
[[File:LG-NL-008.png|200px|right]] Once a route is calculated through this turn (left run, right turn), the heuristics will go over all the lanes and merge them into one instruction. The heuristics will replace the two left straight lanes with the inner segment's left lanes.
For this, the angles of the segments must be within a range of 70-110° per angle. (21° offset)<br>
So X turns will not be supported by default.<br>
With mDLs you can make the angles as much as 90°. And then it works.<br>
The second segment must be less than 50 m. (50 m no longer works).
{{Clear}}
{{Clear}}
[[File:LG-NL-009.png|400px|left]]
<b>Comments</b>
The angles for the blue route fall within the range of 70 and 110, so the Lane Guidance does work. The angle of the second segment to the third is the sum of 35.3 and 71.3 = 106.6.
* Keep the <i>Path</i> as short as possible. Let them end on the first segment of a direction, even if that is an unnamed intermediate segment.
* Selecting all segments in a route to set the <i>Path</i> is also possible with 5 or fewer intermediate segments in the route. You cannot then adjust the route if there are multiple options.
* If a segment has a [[Closures|RTC]], then it is no problem to set a <i>Path</i>.
{{Clear}}
{{Clear}}
=== Illogical turns and incorrect instructions ===
===Instructions===
If a turn is not logical, but is possible, then an instruction will also have to be given. This turn cannot be left blank (the <b>LG</b> will not be saved). This means that the Wazer will also see this illogical turn in the instruction.
Instructions are entered as normal for the turns themselves. For the <b>JB</b> Route or the <i>Path</i>, enter what is on the signs at the time the instruction is given.<br>
Without additional instructions, an app user will not see an LG when going straight through an intersection. If this is desired, it can be set in two ways:
1. By means of a “Go straight” Turn Instructions Override (TIO) on the turn arrow itself;
2. By means of an instruction from the LG. You can choose between Visible Only and Visible and Audible (S&H).
The choice between Visible and Z&H mainly lies in the reason for the setting. If it is just to clarify a situation, Visible alone is often sufficient. If an action has to be performed by the user, Z&H is necessary.
At simple intersections where a straight ahead instruction is required, it does not matter whether you use a “Go straight ahead” [[Junction_Arrows|Turn Instruction Override]] (TIO) or whether you use a Z&H via the <b>LG</b> menu instruction is enabled. However, you have to choose between one of the two, with Z&H being preferred. An important difference is that a Z&H instruction can only be set to a <b>LG</b> arrow for straight ahead, while a “Go straight” <b>TIO</b> can always be set. Another important difference between the two is that a <b>TIO</b> is set on the intermediate segment, and an <b>LG</b> instruction is set on the input segment. This means that the moment at which the instruction is given also differs, and this becomes significant with longer intermediate segments.
With crossings with <b>FL</b> it is a little more complicated. If a <b>TIO</b> has been set up, the following rules currently apply:
# If a <b>TIO</b> is set on the entry or exit segment, it will be used in favor of a <b>TIO</b> on the route;
# If a <b>TIO</b> has been set in the route, this will be used in favor of a <b>TIO</b> on the route;
# If there is only a <b>TIO</b> on the route, it will be used;
# Each <b>TIO</b> is given priority over a Z&H instruction.
====Weaving lanes====
For weaving lanes, merging traffic requires an instruction, because without instruction they will take the exit again. A normal “Go straight” is not possible, because users who are already driving on the main road should not receive this instruction. We solve that with a <b>JB</b>.
[[File:NL-LG-FL2-e.png|750px]]
The instructions are set as follows:<br>
# Select the middle segment (actually the weaving strip) and open the <b>LG</b> menu;
# Set a S&H instruction on the straight ahead lanes;
# Select the entrance segment of the main road;
# Set a “None” <b>TIO</b> on the exit arrow of the <b>JB</b> route that continues the main road.
[[File:NL-LG-FL2-f.png|750px]]
{{Clear}}
A S&H is chosen because the instruction is then given for the split between the exit and the main road. With a “Go straight” <b>TIO</b> on the <b>JB</b> route from the driveway, the instruction comes when entering the <b>JB</b> and that is not desirable. To suppress the S&H instruction for through traffic on the main road, set the “None” <b>TIO</b> (step 4).
{{Clear}}
{{Clear}}
[[File:LG-NL-012.png|350px|right]] Some intersections are composed in such a way that WME automatically selects wrong arrows. These can be corrected manually (spoken instructions are not affected by the selection).
Lane Guidance (LG) now works at intersections with a , H, T and structure.
For lanes over Roundabouts (MULRA) see the Multiple Lanes for RoundAbouts page.
For an explanation of the lane width, see the Road width page.
The distance to the intersection where LG is displayed depends on the road type:
- Highways: FW, Ramp, MH: 1000 meters
- Streets: mH, PS, ST etc: 500 meters
The WME LaneTools Dev script makes setting the LG a bit easier, so it is immediately visible on the map that LG has been set.
Lane Guidance editing is available for level 3 and up.
You will only see arrows for your direction of travel when there is also an instruction. Without turn instruction in the app so no arrows displayed.
We follow as much as possible the arrows on the signs and on the road surface.
When the arrows on the road surface deviate from the arrows on the signs, we follow the signs. Please note: Arrows on the road may be covered by snow or other road users due to traffic jams.
The arrows that the app chooses by default can be overruled, which is sometimes necessary with complex intersections. But also follow the arrows on the signs or on the road. (If it is ultimately a right-angle turn then a 90 degree arrow; if it is a deflecting turn then a slanted arrow.)
Once there are multiple lanes to choose from to go in a direction, enter LG.
If there are no separate lanes, no signs, no arrows, do not enter LG. Also not for exits on MH or mH.
If there are multiple lanes that turn in the same direction, you can enter them.
If arrows have not been applied to the road surface or signs in all directions, this will have to be done in WME. Lanes cannot be left empty.
Lanes that 'normal' traffic cannot use, such as public transport, are not yet supported and can therefore not be indicated yet, unless the intersection has already been adapted for this.
A rush hour lane is only included in the number of lanes in LG if both of the following conditions are met:
An instruction has been set to go straight to stay on the highway;
The rush hour lane is on the left.
We are not going to make any intersection adjustments for the time being to make the LG work.
Saving incorrectly set LG will result in no display in the app for all lanes of the segment in question. In WME you will see an exclamation mark at the junction node, and if you open the LG menu, an exclamation mark at the lane where it is incorrect.
In WME you will also see exclamation marks in the lanes if the node you got the LG from looks (far) out of the picture. These will appear again when the node comes into view again.
Not all arrows as they appear on the road in the Netherlands are available in the LG menu. Choose the most suitable one.
The WME LaneTools Dev script makes setting the LG a bit easier, so the map immediately shows that LG has been set.
Corners
The angles between the segments affect LG. WME automatically chooses the shape of the arrow of the LG based on the angle between segments:
For a right-angle arrow, the angle between segments should be between 68 and 112 degrees;
For a straight arrow, the angle must be between -22 and +22 degrees.
Everything beyond that becomes a turn arrow or extra sharp turn arrow.
This does not always have to be correct, and there are two ways to correct this. One is not necessarily better than the other, you have to consider what is better per situation.
Force arrows in the LG menu;
Adjust the angle between the segments.
If it doesn't matter, force arrows is preferred because of KISS.
Junction with mDL
Junction with mDL
You can adjust the angle of the segments by adjusting the geometry of one of the segments. A micro dogleg (mDL) is the most common method. If you use this method, pay close attention to which segment you are adjusting, and what the effect is on any intersection on the other side of that segment.
You can force the desired arrow by clicking on the arrow in the LG menu and clicking on the correct arrow. You will also see which arrow Waze chooses; it says “(Waze selects)” after it. After you save it, there will be an orange warning: “One or more modified lane indication(s)”. If you click on Change lane instructions you will see which one it concerns, because those arrows are also orange.
Comments
We do not replace heuristics (see below) with forced turns.
If you hover over an arrow in the LG menu, the exit arrow on the map will be highlighted to clarify which exit it concerns.
Exits and filter lanes
We use the following exit instructions and filter lanes on all highways and on most MH and mH roads:
Exit:
Weaving section:
Exit with taper:
Double exit without taper:
Crossings=
At intersections where there is a stop line, we ensure that exits are displayed entirely as their own lane, as shown below:
十-intersection: two intersecting two-way traffic segments (normal roads);
T-junction: a road split into two one-way traffic or a normal road ends at a normal road;
With one or more intermediate segments:
⛛-intersection: a T-intersection of divided roads;
H-intersection: a divided road is crossed by a normal road;
⋕-intersection: an intersection of two divided roads.
There are variants, but they can usually be traced back to the five above.
十-intersection and T-intersection
For this type of intersection, filling in LG is easiest: you fill in the LG exactly as the road layout is, because there is no intermediate segment. You then proceed as follows:
Set all turns, especially those that are not allowed;
Open the LG menu per segment and set LG according to the road layout
For Number of Lanes, the total number of priority lanes;
At Exits, the direction for each lane.
Keep the following in mind:
Road width is in the same menu, but does not affect LG.
Make sure that LG is set in the right direction; look at the A or B node.
Don't forget to click “Save” after the LG is set, otherwise nothing will change.
⛛-intersection, H-intersection and ⋕-intersection
At these intersections there is an intermediate segment, and then LG becomes a bit trickier: for one direction of travel you have to use two segments (1 input segment and 1 intermediate segment) LG are set. The best thing to do when setting up such an intersection is to enter LG direction by direction to keep it as clear as possible for yourself.
The conditions that must be met to achieve a working LG at these intersections are
Crossing roads with separate lanes
Both left and right turns are possible at the intersection;
The two parts of the shared carriageway (entrance and intermediate segment) are more or less in line with each other (maximum offset of 22°, see also the paragraph on corners);
The two intersecting roads are more or less perpendicular to each other (maximum offset of 22°);
The intermediate segment in question is 50 m or shorter;
The number of lanes entering the intersection is equal to the total number of lanes leaving the intersection (total number of lanes leaving the intersection = number of lanes on the intermediate segment + number of right turn only lanes on the entrance segment - in other words, there no new lanes are added or removed in the intermediate segment).
If this is met, LG can be set as follows:
Open the LG menu on the input segment;
Under Number of Lanes, set the total number of priority lanes;
Under Turns, set the right and straight turns as usual. You can also set the priority lanes for turning left as straight ahead;
Now open the LG menu on the intermediate segment that is an extension of the entrance segment;
Under Number of Lanes, set the number of lanes that turn left and go straight;
Under Turns, set the lanes for left turns and straight ahead;
In the example above, there are a total of four lanes, three of which are for straight ahead or left turns. This results in the app at the junction node of the input segment in the following image: Bestand:LG-NL-Arrow-up. png
The mechanism that ensures this is called heuristics.
Comments
Turn instructions are set at the location where the turn is made. So turn right on the entrance segment, and left on the intermediate segment. See below for straight ahead instructions.
The instructions are linked to the first junction node of the intersection.
LG can simply be set at intersections that have a Junction Box (JB) over them. This can simply be done by L3 editors, as long as the segments are locked at that level.
At an H intersection, the divided road has no intermediate segment. There, LG can be fully set to the input segment. Depending on the angles, this can also apply to parts of a ⛛ intersection.
Forced straight arrows on the input segment do not work for heuristics.
If there is one lane on the entrance segment for turning left (and possibly straight ahead), the intermediate segment will also only have one lane. This is the only exception to the rule that LG is not set for a single lane, otherwise the heuristic will not work.
Far Lanes
Far Lanes (FL) is another way to apply Lane Guidance. This not only allows you to set the LG for a single intersection, it also provides the option to indicate preferred lanes for a subsequent intersection. In principle, it is also no longer necessary to create wybertjes or long parallel segments in order to provide correct instructions; one junction node is now sufficient for this.
There are two options for applying FL:
FL1 - Through a Junction Box (JB) - available to L4+ editors;
FL2 - By Path - available for L5+ editors.
If FL1 has been applied, it is not immediately visible in WME. You will then need to open the LG menu to see if FL has been set. FL2 is recognizable in the map; then there is a light blue dot with a white arrow on the departure segment, provided that the map layer Paths is active. The LG menu looks the same as FL1.
Comments
In WME, FL is called Far Turns. In this article, Far Lanes / FL is used consistently.
During the rollout, global How To's have been written for FL1 and FL2.
Paths do not yet record speed data, a JB must be used for that.
FL1 and FL2 cannot be combined. A segment that is part of a JB cannot be part of a Path and vice versa. If something like this is necessary, the segment must be cut.
FL2 Paths may cross each other.
Using FL for one direction of a departure segment breaks the heuristic (if any). FL must then be set for all routes from the departure segment for which heuristics would normally be used.
FL cannot be used on connected segments; there must be at least 1 segment in between.
The LG arrows for FL must always be selected manually; there is no Waze selects preference.
For both FL1 and FL2 there is currently a restriction that the JB or the path may not be longer than approximately 1 km.
FL is not set to make only the LG arrows correct. It must add something functional.
Junction Box (Far Lanes 1)
FL will not be necessary for every intersection with a Junction Box. A normal ⋕-crossing over which a JB is placed does not need to be adjusted as far as LG is concerned. Only when there are multiple lanes for one direction and lanes in the same direction have different destinations, or if it becomes problematic at the next intersection if you use the wrong lane for that direction, FL is set.
In the example below, the situation for the direction of travel is indicated with the red arrow as follows:
2 Left lanes turn left from Vondellaan to Plesmanlaan;
1 Right lane turn right from Plesmanlaan to Darwinweg.
If you are in the left lane for turning left, it can be difficult to turn right at the next intersection. That segment is 56 meters, which can result in strange maneuvers if you are not positioned correctly, or a missed turn. This can be due to heavy traffic in the right-hand pre-sorting area, or heavy traffic on Plesmanlaan. It is therefore best to advise that the Wazer uses the right pre-sort box.
There is already a JB at this intersection, because traffic lights for the two intersections are coordinated. The JB then ensures that the speed is registered per route, instead of only on segments (see JB wiki page for more information about this). So although FL2 can be used for the situation itself, the presence of the JB forces us to use FL1.
If the departure segment (Vondellaan) is selected, this is the normal image:
Normal heuristics are set, so every user turning left will be offered both lanes. At most, the “Then turn right” instruction will make someone suspect that it might be useful to use the right-hand sorting box. To improve this, we proceed as follows:
Remove heuristic, because it is broken by the presence of FL:
Remove the LG on the intermediate segment between Vondellaan and Plesmanlaan;
On the departure segment (Vondellaan), uncheck the two normal straight arrows under Exits.
Set FL for the route Vondellaan - Darwinweg:
On the departure segment, check the middle lane at Far Turns;
Click in the empty box on the left and select the left arrow.
Set FL for the route Vondellaan - Plesmanlaan (necessary due to the missing heuristics):
On the departure segment, check the two left lanes at Far Turns;
Click in the empty box on the left and select the left arrow.
Comments
The short right turn remains set via normal LG, because for FL there must be more than 2 segments in the route. It is therefore not an option at Far Turns.
The instructions are set as normal. If there are specific instructions for the route, set them to the arrow pointing out of the JB.
This gives the following result
Another possibility
Another possibility is that pre-sorting must take place earlier for a certain intersection. In the example below, you must already pre-sort at the first traffic light (VRI1) in order to turn left - in particular - at VRI2. Must be, because arrows on the road are a mandatory driving direction. It is therefore not only pleasant, but also necessary to show the correct LG in Waze at VRI1. This cannot be solved with heuristics. In any case, the distance is too great; the segment between VRI1 and VRI2 is 75 m long. Moreover, heuristics are already applied at the intersection at VRI2, and this cannot be done twice in a row.
So FL must be set. Since the VRIs are also linked together here, FL1 using a JB is the correct solution. In addition, the JB is used to prohibit U-turns at the ⋕ intersection.
FL is set as follows:
Select the input segment and open the LG menu;
Uncheck all the boxes for Turns;
At Far Turns, set the arrows according to the signs. Because you are showing left turn arrows, you cannot set a See-and-Hear (S&H) instruction;
Remove the heuristic at the intersection at VRI2 - only for this route, the other heuristics should remain as normal.
Set the instruction (VI & TTS) on the JB route, but also on the exit of the intermediate segment of the ⋕ intersection itself.
The user sees this instruction when accessing VRI1. (The lack of VI & TTS is a bug that still needs to be fixed.)
Paths (Far Lanes 2)
If there is no Junction Box at an intersection, and it is not necessary to record speed data for a route, a Path can be used instead of a JB added. Another reason may be that there are too many exits to be allowed to register a JB (>16 currently).
Also for FL2, at least 3 contiguous segments must form a route. There is no maximum number of segments, but with more than 5 intermediate segments, the entire path must be selected instead of just the departure and exit segments.
The reason for setting this Path is the split that during rush hour can lead to traffic already on the departure segment traffic jam represents the direction N206. It may then be difficult to merge into the right lane, so it is better to advise the correct lane during the departure segment. This also applies the other way around; You don't want to be stuck in traffic jams unnecessarily for the better route to the center.
In this case there are 5 segments between the departure and exit segments, so only those 2 need to be selected. A green route and a white icon with a pendulum will then appear, indicating that a path can be set. That icon turns blue when you hover your mouse over it. If you don't see the route and icon, several things could be wrong:
You are zoomed in too far and/or shifted too far from the departure segment in the map;
There is a segment in the route in a JB;
There are more than 5 intermediate segments in the route.
It doesn't matter whether you have the map layer for Paths enabled or not. Once you have saved, you will see the Path on the General tab of the departure segment. This is also the place to delete a Path.
Setting the LG arrows is again done via the LG menu. Again, follow the arrows on the signs and road.
Comments
Keep the Path as short as possible. Let them end on the first segment of a direction, even if that is an unnamed intermediate segment.
Selecting all segments in a route to set the Path is also possible with 5 or fewer intermediate segments in the route. You cannot then adjust the route if there are multiple options.
If a segment has a RTC, then it is no problem to set a Path.
Instructions
Instructions are entered as normal for the turns themselves. For the JB Route or the Path, enter what is on the signs at the time the instruction is given.
Visible and audible or Go straight?
Without additional instructions, an app user will not see an LG when going straight through an intersection. If this is desired, it can be set in two ways:
1. By means of a “Go straight” Turn Instructions Override (TIO) on the turn arrow itself;
2. By means of an instruction from the LG. You can choose between Visible Only and Visible and Audible (S&H).
The choice between Visible and Z&H mainly lies in the reason for the setting. If it is just to clarify a situation, Visible alone is often sufficient. If an action has to be performed by the user, Z&H is necessary.
At simple intersections where a straight ahead instruction is required, it does not matter whether you use a “Go straight ahead” Turn Instruction Override (TIO) or whether you use a Z&H via the LG menu instruction is enabled. However, you have to choose between one of the two, with Z&H being preferred. An important difference is that a Z&H instruction can only be set to a LG arrow for straight ahead, while a “Go straight” TIO can always be set. Another important difference between the two is that a TIO is set on the intermediate segment, and an LG instruction is set on the input segment. This means that the moment at which the instruction is given also differs, and this becomes significant with longer intermediate segments.
With crossings with FL it is a little more complicated. If a TIO has been set up, the following rules currently apply:
If a TIO is set on the entry or exit segment, it will be used in favor of a TIO on the route;
If a TIO has been set in the route, this will be used in favor of a TIO on the route;
If there is only a TIO on the route, it will be used;
Each TIO is given priority over a Z&H instruction.
Weaving lanes
For weaving lanes, merging traffic requires an instruction, because without instruction they will take the exit again. A normal “Go straight” is not possible, because users who are already driving on the main road should not receive this instruction. We solve that with a JB.
The instructions are set as follows:
Select the middle segment (actually the weaving strip) and open the LG menu;
Set a S&H instruction on the straight ahead lanes;
Select the entrance segment of the main road;
Set a “None” TIO on the exit arrow of the JB route that continues the main road.
A S&H is chosen because the instruction is then given for the split between the exit and the main road. With a “Go straight” TIO on the JB route from the driveway, the instruction comes when entering the JB and that is not desirable. To suppress the S&H instruction for through traffic on the main road, set the “None” TIO (step 4).


